Modbus TCP Overview according to Intellicom Innovation

Modbus TCP - An introduction
MODBUS® TCP/IP IS an Internet protocol. The fact that TCP/IP is the transport protocol of the Internet automatically means that MODBUS® TCP/IP can be used over the Internet! Among other things it was designed to reach this goal, and as part of this goal the MODBUS® protocol specification has been submitted to the Internet Engineering Task Force (IETF). In practical terms, this means that a MODBUS® TCP/IP device installed in Europe can be addressed over the Internet from the USA from anywhere else in the world.
The implications for a vendor of equipment or an end-user are endless.
  • Performing maintenance and repair on remote devices from the office using a PC and browser reduce support costs and improve customer service.

  • Logging onto a plant's control system from home allows the maintenance engineer to maximize his plant's uptime and reduce the number of times that he is called out from home.

  • Managing geographically distributed systems becomes easy using commercially available internet/intranet technologies.
MODBUS® TCP/IP has became an industry de facto standard because of its openness, simplicity, low cost development, and minimum hardware required to support it.
At this moment there are more than 200 MODBUS® TCP/IP devices available in the market. It is used to exchange information between devices, monitor and program them. It is also used to manage distributed I/Os, being the preferred protocol by the manufacturers of this type of devices.

Combining a versatile, scaleable, and ubiquitous physical network (Ethernet) with a universal networking standard (TCP/IP) and a vendor-neutral data representation (MODBUS® ) gives a truly open, accessible network for exchange of process data.

The protocol - Modbus TCP
Modbus/TCP basically embeds a Modbus frame into a TCP frame in a simple manner. This is a connection-oriented transaction which means every query expects a response.

This query/response technique fits well with the master/slave nature of Modbus, adding to the deterministic advantage that Switched Ethernet offers industrial users. The use of OPEN Modbus within the TCP frame provides a totally scaleable solution from ten nodes to ten thousand nodes without the risk of compromise that other multicast techniques would give.

Performance from a MODBUS TCP/IP system
The performance basically depends on the network and the hardware. If you are running MODBUS® TCP/IP over the Internet, you won't get better than typical Internet response times. However, for communicating for debug and maintenance purposes, this may be perfectly adequate and save you from having to catch a plane or go to site on a Sunday morning!

For a high-performance Intranet with high-speed Ethernet switches to guarantee performance, the situation is completely different.

In theory MODBUS® TCP/IP carries data at up to 250/(250+70+70) or about 60% efficiency when transferring registers in bulk, and since 10 Base T Ethernet carries about 1.25 Mbytes/sec raw, the theoretical throughput is:
1.25M / 2 * 60% = 360000 registers per second and the 100 Base T speed is 10 x greater.

This assumes that you are using devices that can service Ethernet as fast as bandwidth is available.
Practical tests carried out by Schneider Automation using a MOMENTUMTM Ethernet PLC with Ethernet I/O demonstrated that up to 4000 I/O bases could be scanned per second, each I/O base having up to 16 12-bit analog I/O or 32 discrete I/O. Four bases could be updated in one millisecond. While this is below the theoretical limit calculated above, it must be remembered that the tested device was running with a lowly 80186 CPU running at 50Mhertz with an effective computing power of 3 MIPS (compared to the 700 MIPS of a 500MHz Pentium). Also, these results are nevertheless faster than the proprietary I/O scan methods used to date.

As low-end CPU's get cheaper, Momentum-type devices will chase the theoretical limit, although they'll never reach it because the limit will be continually pushed further away with 1 Gigabit Ethernet, 10 Gigabit Ethernet, etc. This is in contrast to other field-buses which are inherently stuck at one speed.

How can existing MODBUS devices communicate over MODBUS TCP/IP?
MODBUS® TCP/IP is simply MODBUS® protocol with a TCP wrapper. It is therefore extremely simple for existing MODBUS® devices to communicate over MODBUS® TCP/IP. To do this a gateway device is required to convert MODBUS protocol to MODBUS TCP/IP.

Recommended Modbus products:
Modbus web server Gateway (Supports Ethernet, GSM, GPRS, modem)
Features
• Connects Modbus RTU products to SCADA or PLC’s over Ethernet
• Supports Ethernet, Internet, LAN, GSM/GPRS, Modbus TCP, email, FTP etc.

Modbus RTU – Modbus TCP Gateway
Features
• Connects Modbus RTU products to SCADA or PLC’s over Ethernet
• Transparent Gateway between Modbus RTU and Modbus TCP.

Serial Server
Features
• Connects Modbus RTU/ASCII products to any Windows based software
• Transparent connection
• 2 ports (1 RS485 + 1 RS232)

Modbus I/O over Internet or GSM/GPRS
Features
• Modbus I/O: 4 DI, 4 DO, 2AI, 1AO, “ RTD (Temperature)
• Can be accessed through Internet and Mobile phones

IAM Forum Site Now Online

Friends, I've some good news! The Industrial Automation and Mechatronics Forum site is now up and running. We now have a portal where we can interact. This would be great to find and chat up your colleagues, mentors and friends. The site can be accessed through the link at the navigation bar at the address http://forum.iamechatronics.com.

Remember, this is ours.

the Admin

Notes on Pyrometer Calibration Procedure

From the desk of Edwin B. Mariano (Hotmill Systems Engineer of Global Steel Philippines Inc.), who is a good friend of mine, generated a step by step procedure on how to calibrate the pyrometers.

Below is a note on the blackbody furnace and proposed standard procedure in the calibration of "Infrared Thermometer" otherwise known as "Pyrometers" used in rolling mills.

Every object radiates thermal energy at temperatures above absolute zero. Measuring the temperature of an object using optical pyrometer is based on the principle that the thermal radiation from the object being measured is a function of its temperature. For any particular temperature and wavelength, the energy radiated by a surface is directly proportional to the spectral emissivity of the object. Emissivity is the value associated with the surface's ability to get of heat by radiating thermal energy, and different substances have different emissivities. The value of a substance's spectral emissivity is a number in the range from 0 to 1.0, which is the ratio of the energy radiated by object's surface to the energy radiated by a perfect blackbody at the same temperature.

The primary issue when using infrared thermometer sensors is that a real object does not behave like a perfect radiator.

Having calibrated an infrared thermometer on a perfect radiator (blackbody source), the ability to measure temperature of a real object relates directly to how well the object's emissivity is known. An object with an emissivity of 0.8 emits only 80 percent of the energy of the blackbody, so unless one accounts for an object's actual emissivity, the indicated temperature reading will be lower than the object's actual temperature. Most radiation thermometers provide for emissivity adjustment.

The instrument manufacturer calibrates an infrared thermometer (pyrometer) by aiming it a blackbody source, which is designed specifically for testing and calibrating infrared thermometers. Blackbody sources resemble a furnace with an opening to view a surface or cavity heated and controlled to a selected temperature.

There are basically two types of infrared calibration sources, the Hot Plate Blackbody and the Cavity Type Blackbody source. But, let us concentrate on the cavity type blackbody source as this is available within the author's reach.

The cavity type blackbody source consists of a blind hole in a cylinder or sphere where the temperature of teh cavity is controlled by a temperature controller, using a thermocouple probe. The cavity type blackbody source has a higher emissivity compared to a hot plate blackbody source. The emissivity of a cavity type blackbody source is typically 0.98 or higher which makes them ideal for precise calibration tasks.

When using a blackbody calibration source, we need to follow certain ground rules:
  • The infrared thermometer should be aimed perpendicular to the target area of the blackbody unit. If aimed at an angle, reflected infrared radiation energy can impair calibration accuracy.
  • The field of view area of the thermometer at a selected distance should be smaller than the target area of the blackbody unit.
  • Do not bring the infrared thermometer too close to the target area of the blackbody especially at high temperatures. The radiated heat from the blackbody can not only impair the calibration accuracy but also can potentially damage the unit under test.
  • Always aim the infrared thermometer to the center of the target area.
  • When changing the temperature setpoint on the blackbody unit, make sure the unit is fully stabilized to the new temperature setting before making any calibration test. Usually going up in temperature takes less time than going down in temperature.
  • Do not unplug a blackbody calibration source while it hot. There are usually built-in fans to remove the heat even when the power switch is off. Let the internal fan continue to run until the unit is cooled down.
User should be guided on recommended operating conditions. These factors, along with proper maintenance, will allow safe and satisfactory operation of the furnace.

Safety is very important when working with furnaces. Follow safety procedures for working around the furnace. Controllers are used to control temperatures to constant value ( the operators sets the required temperature; when achieved the temperature is maintained on this value until next intervention of the operator) or to control temperature according to simple program (the operator sets the temperature build-up speed).

Step 1.
• Set-up and mount the pyrometer’s sensor and controller. When blackbody furnace has been properly prepared and ready for operation. Operating suggestions: Manual intervention if batch calibration for auto mode, refer to controller operating manual ramp programming.

Step 2.
• Power up the blackbody furnace to heat up 400 degrees Celsius at rate of 3 degrees Celsius per minute. Hold at 400 degrees Celsius for two hours or more (preferably overnight). Let furnace to heat up until set point 400 degrees Celsius is stabilized at this set point.

Step 3.
• While the furnace is building up its temperature, do preliminary observation on the controller before turning on the power, check if the indicator/processor analog meter pointer is in zero position. If not, with a small screwdriver, gently turn the advancement screw as necessary to zero the pointer at the left side of the scale.

Step 4.
• Operator should follow a projected heating curve for the duration of heating at the desired temperature for calibration. Let furnace heat up until each REF. # set point and stabilized at this set point.Step
• Size = Pre-determined value for temperature change.
• Ramp = Select the pre-determined rate changes to the next value.
• Increment using numerical keypad (increment and decrement).

Step 5.
• Power on the controller, and allow 20 minutes warm-up time.

Step 6.
• Cover the objective lens with a solid, opaque object that will completely block any external radiation.

Step 7.
• The Response Time control must be in the FAST position. If a Peak Picker option is installed, toggle the Peak Picker switch to DIRECT.

Step 8.
• Depress the momentary toggle switch label CALIBRATE.
• If your instrument has and analog meter, observe if the meter reads within the read CAL. ZONE. If the meter reads outside the CAL. ZONE, make some adjustment.
• If your instrument has a digital readout, depressing the Calibrate switch should produce a reading of 500 +/- 10 digits, regardless of model. If it does not, do some calibration.
• Normal calibration level: Pointer to center of CAL position on analog display; numerical reading of 500 +/- 10 digits on digital display.

Note: Refer to manufacturer’s infrared thermometer manual for Calibration Check.

Step 9.
• Without any calibration adjustment to be undertaken, take reading on the projected temperatures for upscale and then downscale reading. This is to determine possible error. Set the Emissivity/E-slope adjustment to the highest value of the controller.

Step 10.
• If calibration is to be done for several pyrometer set or batch, repeat steps3 to 9 and note the reading taken for each set of upscale and downscale reading.

Step 11.
• With each set of the reading taken for upscale and the downscale, determine if there are noticeable errors. If reading is linear and within the projected temperature range. No further adjustment is needed, the pyrometer set is calibrated.

Step 12.
• If error is present, calibrate the pyrometer set. By setting the blackbody furnace temperature to the lowest range of the controller then calibrate the controller to zero.

Step 13.
• Do step 12 to other pyrometer set with determined error.

Step 14.
• Increase the blackbody furnace temperature setting to the highest range of the controller then calibrate the controller for this setting.

Step 15.
• Do step 14 to other pyrometer set with determined error.

Step 16.
• Check upscale reading against projected temperature of the pyrometer then set and take note of its reading. If this batch calibration, do the same to the other pyrometer sets.

Step 17.
• Check the downscale reading against the projected temperature of the pyrometer set and take note of its reading. If this is a batch calibration do the same to other pyrometer sets.

Steps 18.
• If there are still discrepancies on the linearity, repeat step 12 to 17. If there are none, calibration is done.

Step 19.
• Cool down blackbody slowly. (Refer to the cooling curve below).

Note: During operation, one of the most important requirements for accurate temperature measurements is the Emissivity/E-slope adjustment to effectively tune circuits measurement to the characteristics of the process material. To get a true measure of temperature, we must set the Emissivity/E-slope control in the system to match Emissivity of the material being measured.

The BSIAM Studes...

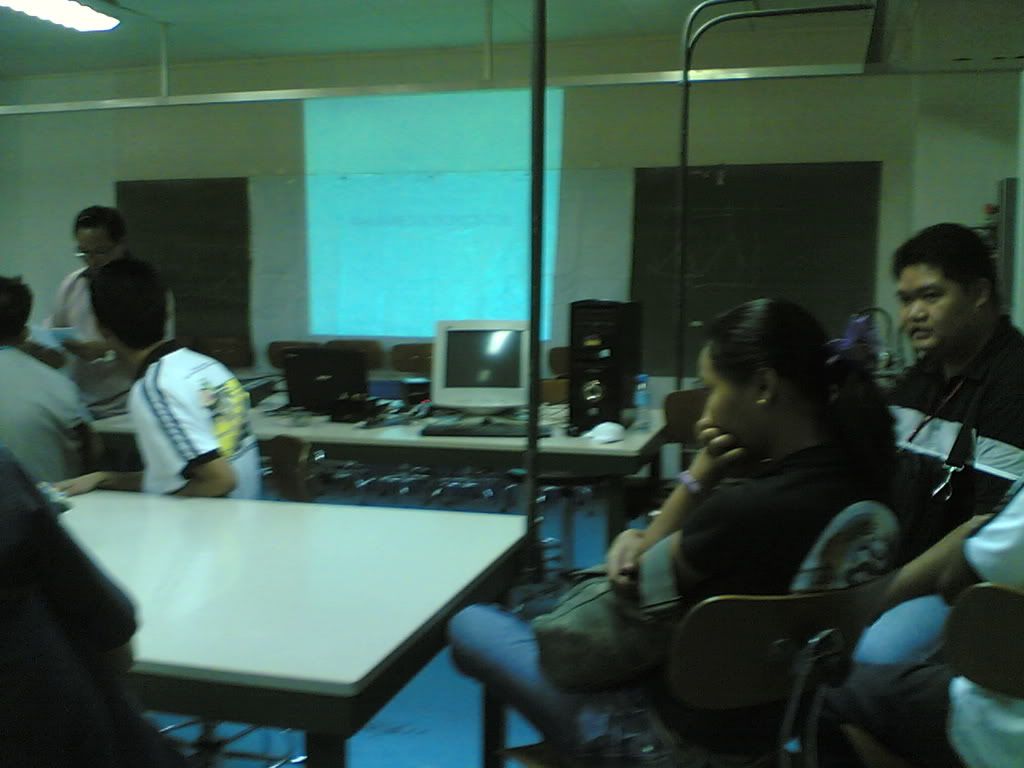
The BSIAM students in one of their discussions with Professor Joel Barrera on one of their Mechatronics subjects.


Listening...


Young, Wacky but very promising.

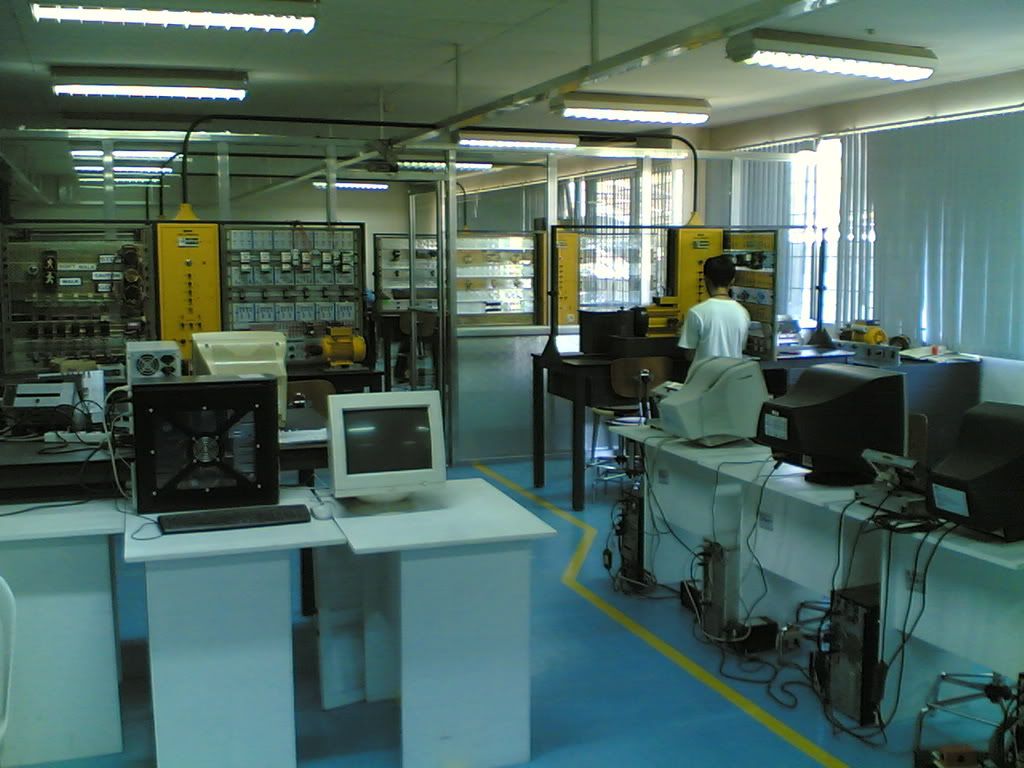
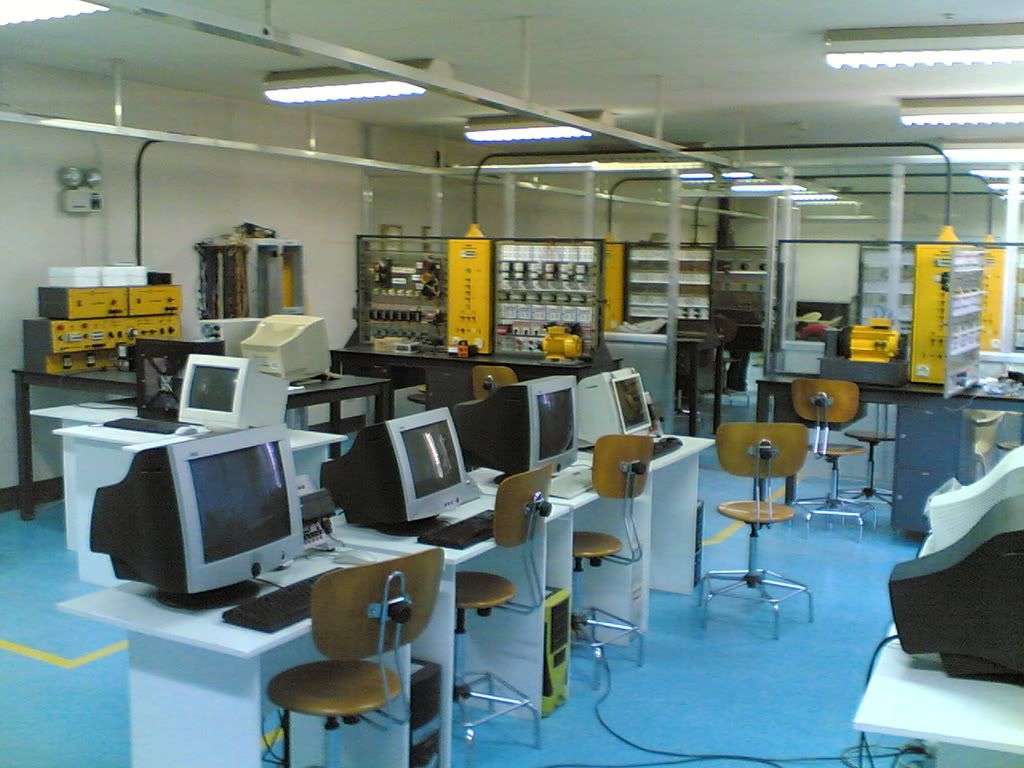
Industrial Motor Control Room of IACET, MSU-IIT

The Industrial Motor Control Room of the Industrial Automation and Controls Engineering Technology, Mindanao State University - Iligan Institute of Technology is the center of the education for Motors Circuits, Building Wiring, and Sequence Control and other related subjects for students. Trainings are conducted here for such fields either in lecture and/or practical application. Conventional hard-wired industrial motor control circuits are taken up like the simple start-stop circuit, dynamic braking circuit, forward-reverse control and extending up to controls like elevator systems with safety interlocking and to other fully systemized motor control operations. This is done by using magnetic contactors, relays, timers and other electromechanical devices.

In the advancement of the lessons, the student/practicioner will apply the said circuits learned using the conventional electromechanical circuits to using PLC as the processing unit for control. More advanced industrial circuits will be taken up using advance PLC programming. This will be done in actual practice and not just in lecture method.

The training offered here is of world-class quality for instructors and professors are trained in various known institutions worldwide.

For more information, contact Professor Cesar Gabo of IACET, MSU-IIT for more details. He is in-charge for these trainings. Feel free to contact him.

Level Measurement Techniques

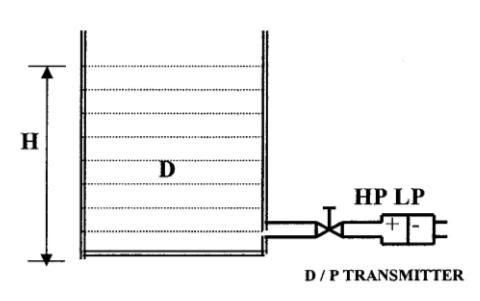
Someone may ask you if you can measure level with using a pressure meter, particularly a differential pressure meter, you should answer yes. Since pressure and level is somewhat related if we would deeply dig into their relationship.

Answering the question in how to do it, see the picture below. The bottom area of the vessel is connected to the high pressure side of the differential pressure meter or transmitter.
Differential Pressure = H x D
The diffferential pressure is applied to the high pressure side of the transmitter and is calibrated.

How is D.P. transmitter applied to a close tank?
In close tank the bottom of the tank is connected to the high pressure side of the transmitter and top of the tank in connected to L.P. side of the transmitter. In this way the vessel pressure is balanced.

How is D.P. transmitter applied to an open tank?
On an open tank level measurement the L.P. side is vented to atmosphere. Whatever pressure acts is on the H.P. side which is a measure of level.

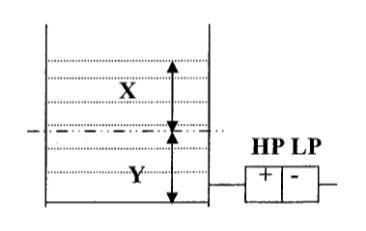
SPAN = (X) ()
ZERO SUPPRESSION = (Y) (Specific Gravity)

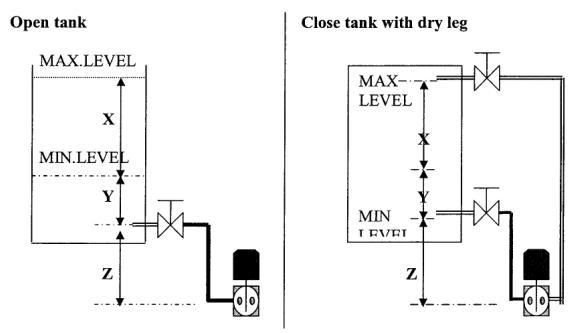
Also, how can a differential pressure transmitter be applied to a close and open tank with Dry Leg to measure level?

Considering the formula below;

Span = (X) (GL)
Hw at minimum level - (Z)(GS) + (Y)(GL)
Hw at maximum level = ( Z ) ( Gs ) + (X + Y) ( GL)
Where:
GL= Specific gravity of tank liquid
Gs = Specific gravity of seal liquid
Hw = Equivalent head of water
X, Y & Z are shown below

Example:
Open tank with:
  • X =300 inches
  • Y =50 inches
  • Z =10 inches
  • GL= 0.8
  • Gs= 0.9
  • Span = (300) (0.8) = 240 inches
Solving,
Hw at minimum level = ( 10 ) ( 0.9 ) + ( 50 ) ( 0.8 ) = 49 inches
Hw at maximum level = (10 ) ( 0.9 ) + ( 50 + 300 ) ( 0.8 ) = 289 inches
Calibrated range = 49 to 289 inches head of water

Level Measurement Part 1

(A part of Instrumentation Basics...)

We will be discussing about level measurement which is very vital part in plant automation. Under the industrial category of instrumentation, it is very important to measure levels of fluid for open and closed loop systems.

There are two ways to measure level, the Direct Method and the Indirect Method.

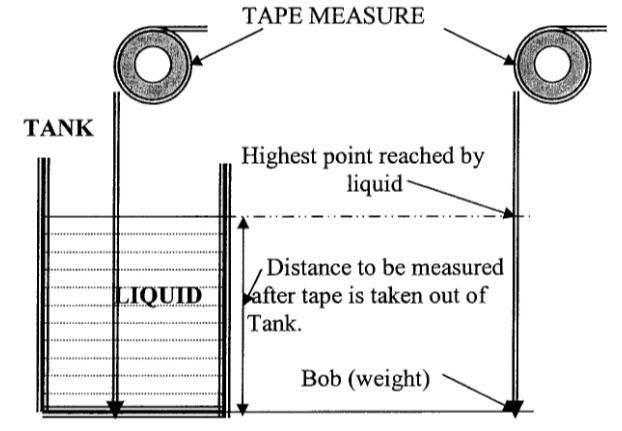
For direct level measurement, we can use the Bob and tape and Sight glass methods

A bob weight and measuring tape provide the most simple and direct method of measuring liquid level. See picture at the right for the graphical presentation.

One can also use a sight glass. This consists of a graduated glass tube mounted on the side of the vessel. As the level of the liquid in the vessel change, so does the level of the liquid in the glass tube.

For the indirect level measurement, One can use pressure gauges.

This is the simplest method, for pressure gauge is located at the zero level of the liquid in the vessel. Any rise in the level causes an increase of pressure which can be measured by any gauge.

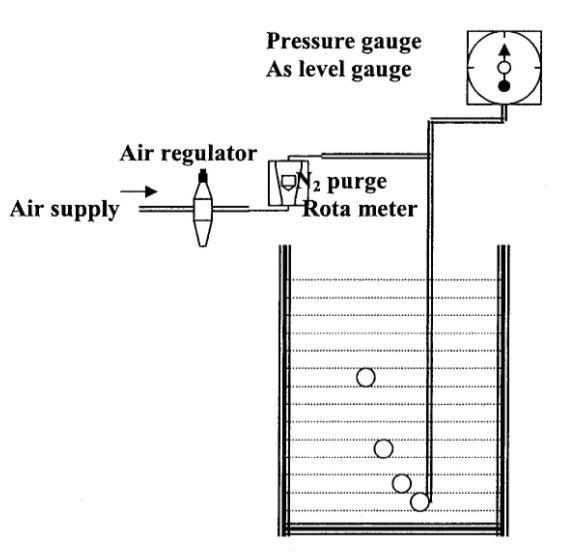
Another way is through the use of a purge system. In this method a pipe is installed vertically with the open end at zero level. The other end of the pipe is connected to a regulated air supply and to a pressure gauge. To make a level measurement the air supply is adjusted so that pressure is slightly higher than the pressure due to height of the liquid. This is accomplished by regulating the air pressure until bubbles cab be seen slowly leaving the open end of the pipe.

The air pressure to the bubbler pipe is minutely in Excess of the liquid pressure in the vessel, so that Air pressure indicated is a measure of the level in The tank.

The method above is suitable for open tank applications. When a liquid is in a pressure vessel, the liquid column pressure can't be used unless the vessel pressure is balanced out. This is done through the use of different pressure meters.

Through differential pressure meters, one can also measure the level of liquid inside the tank.Connections are made at the vessel top and bottom, and to the two columns of the D.P. meter. The top connection is made to the L.P. column of the transmitter and the bottom to H.P. column of the transmitter. The difference in pressure in the vessel is balanced out, since it is fed to both the column of the meter. The difference in pressure deducted by the meter will be due only to the changing, level of the liquid.

Another way is through the displacer type level measurement.The leveltrol is one of the most common instruments used measuring level in closed tanks. This instrument works of Archimedes principle. The displacer in immersed in the liquid due to which there is loss of weight depending on the specified gravity of the liquid. This displacer hangs freely on a knife transmitted to the pneumatic or electronic counterpart at the other end.

How to's of Instrument Calibration

(a part of Instrumentation Basics...)

How do you identify an orifice in the pipe line?

An orifice tab is welded on the orifice plate which extends outer of the line giving an indication of the orifice plate.

Why is the orifice tab provided?
The orifice tab is provided due to the following reasons.
• Indication of an orifice plate in a line.
• The orifice diameter is marked on it.
• The material of the orifice plate.
• The tag no. of the orifice plate.
• The mark the inlet of an orifice.

Advantages and Disadvantages of Orifice Plates
Advantages of orifice plates include:
• High differential pressure generated
• Exhaustive data available
• Low purchase price and installation cost
• Easy replacement

What is Bernoulli's theorem and where it is applicable?
Bernoulli's theorem states the "total energy of a liquid flowing from one point to another remains constant." It is applicable for non compressible liquids.

How do you identify the H. P. side or inlet of an orifice plate in line?
The marking is always done H. P. side of the orifice tab which gives an indication of the H. P. side.

How do you calibrate a D. P. transmitter?
The following steps are to be taken which calibrating:
  1. Adjust zero of the Tx'r.
  2. Static pressure test : Give equal pressure on both sides of the transmitter. Zero should not shift. If it is shifting carry out static alignment.
  3. Vacuum test: Apply equal vacuum to both the sides. The zero should not shift.
  4. Calibration Procedure: * Give 20 psi air or 24Vdc supply to the transmitter.
    * Vent the L.P. side to atmosphere.
    * Connect output of the Instrument to a standard test gauge or Multimeter and adjust zero.
  5. Apply required pressure to high pressure side of the transmitter and adjust the span.
  6. Adjust zero again if necessary.
What is the seal liquid used for filling impulse lines on crude and viscous liquid ?
Glycol.

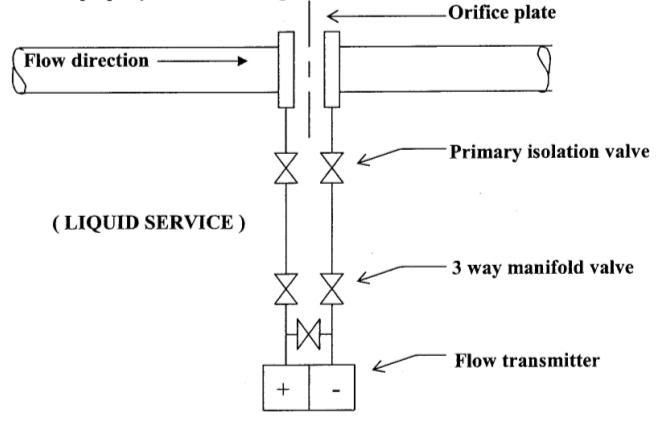
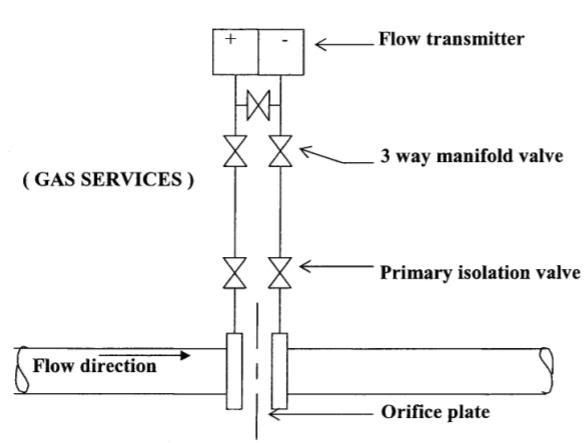
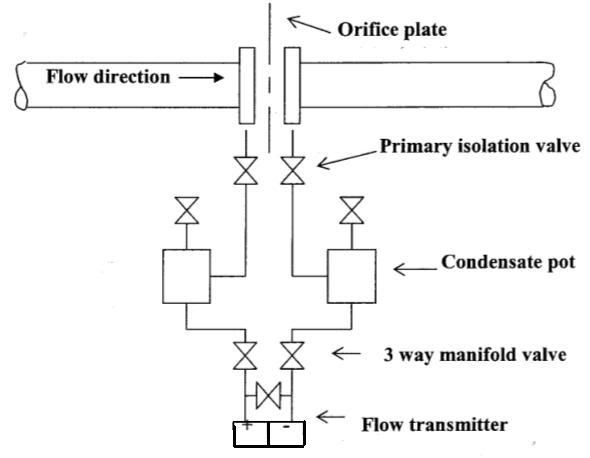
How do you carry out piping for a Different pressure flow transmitter on liquids, gas and steam services? Why ?
Liquid lines : On liquid lines the transmitter is mounted below the orifice plate because liquids have a property of self draining.


Gas Service : On gas service the transmitter is mounted above the orifice plate because Gases have a property of self venting and secondly condensate formation.


Steam Service : On steam service the transmitter is mounted below the orifice plate with condensate pots. The pots should be at the same level.
Previous Lesson
Next Lesson

Calibration of Pyrometers using Black Body

According to wikipedia, a Pyrometer is any non-contacting device that intercepts and measures thermal radiation. This measure is used to determine temperature, often of the object's surface.

The word pyrometer comes from the Greek word for fire, "πυρ", and meter, meaning to measure. Pyrometer was originally coined to denote a device capable of measuring temperatures of objects above incandescence (i.e. objects bright to the human eye).

Pyrometers are used to 'read' radiated heat in steel industries, ceramic manufacturing and other applications requiring high temperature from a few hundreds to thousands of degrees Celsius of temperature. Most pyrometers come in a set of a sensor and a controller. The controller may come readouts of analog or digital.

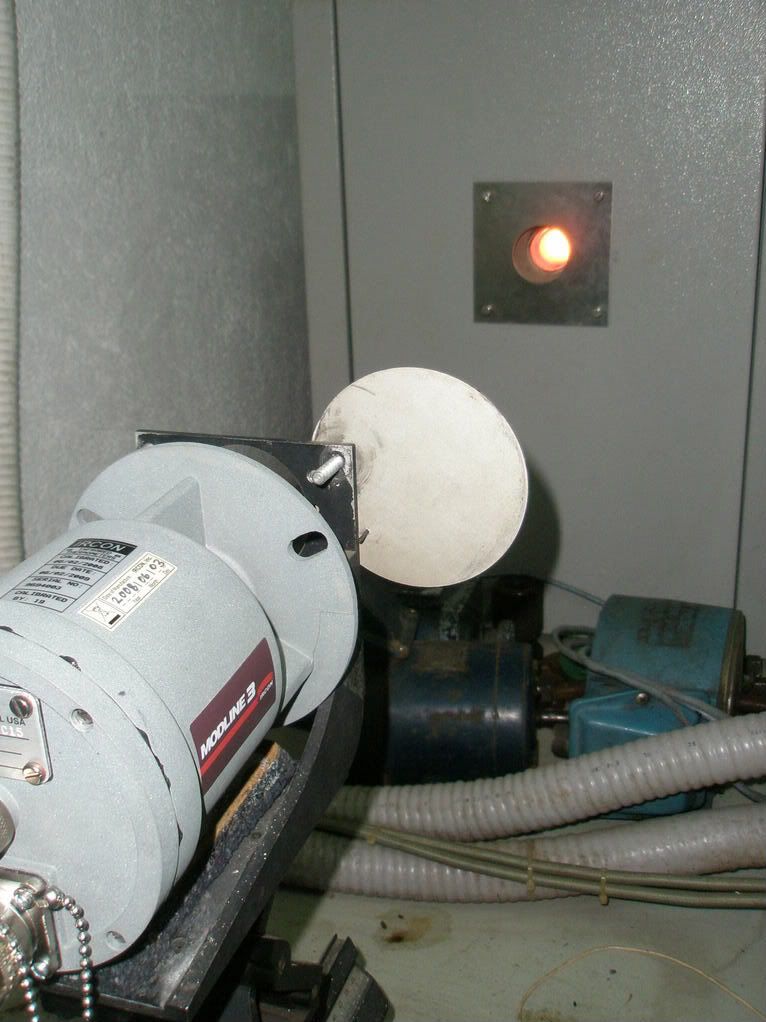
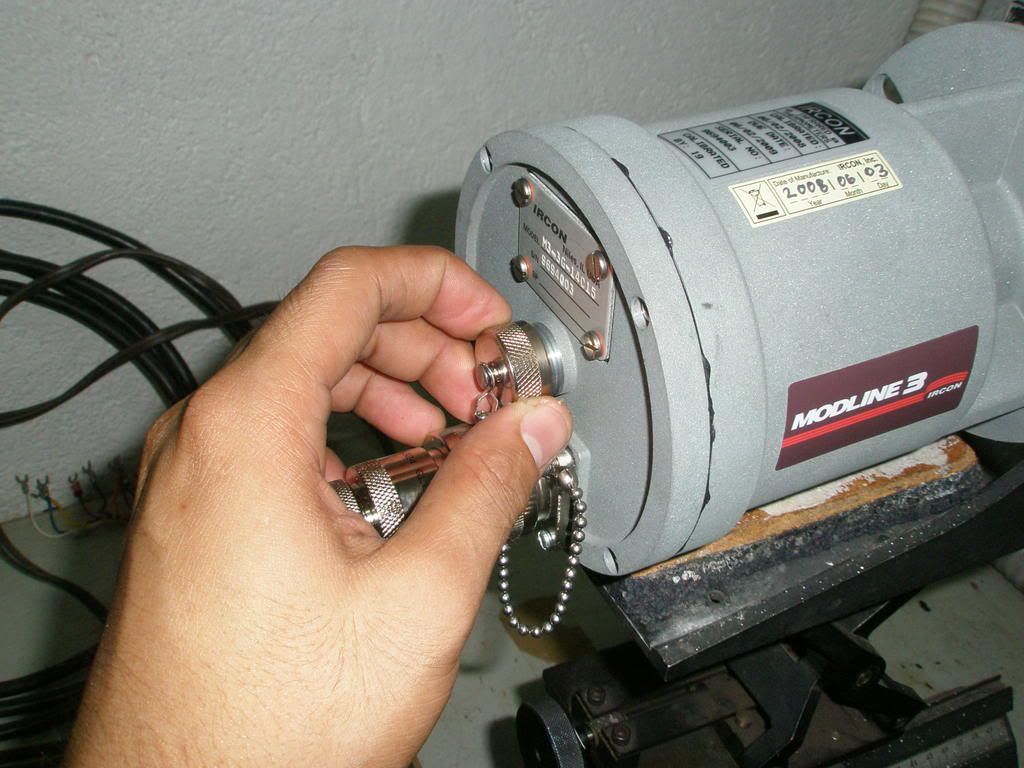
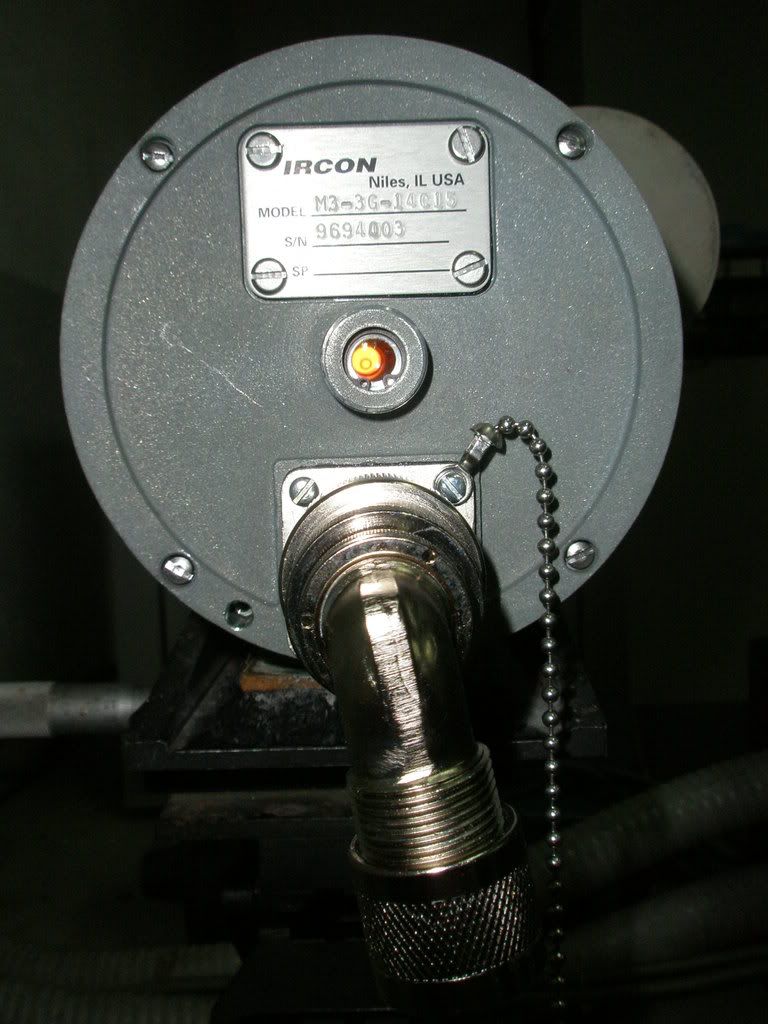
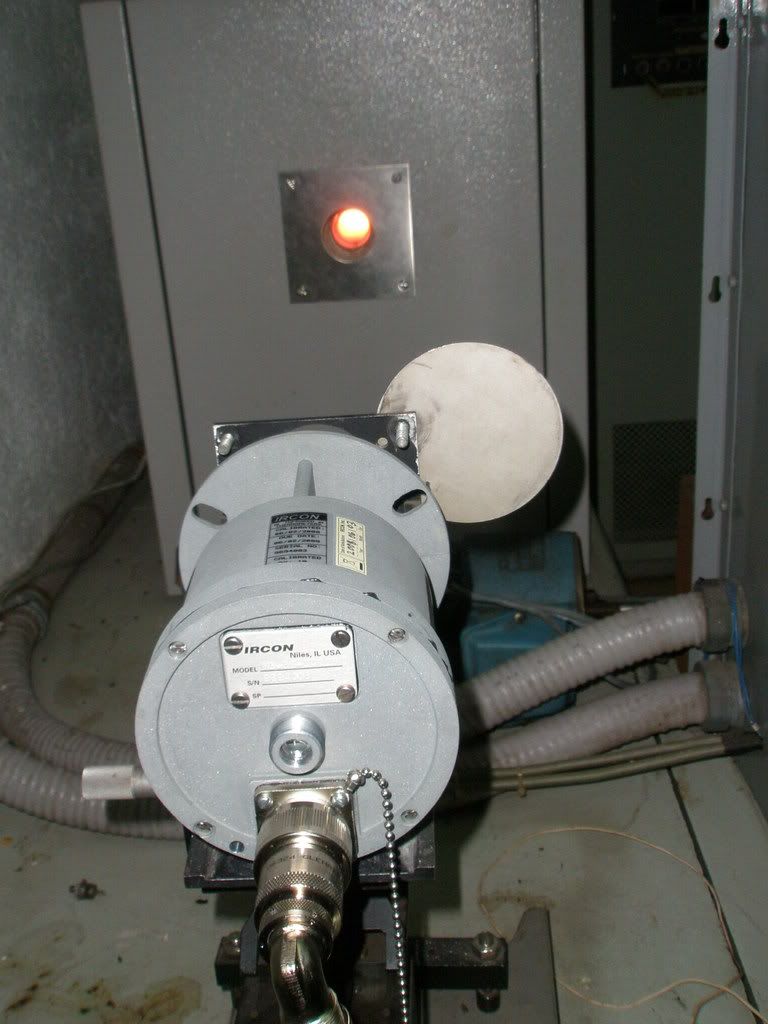
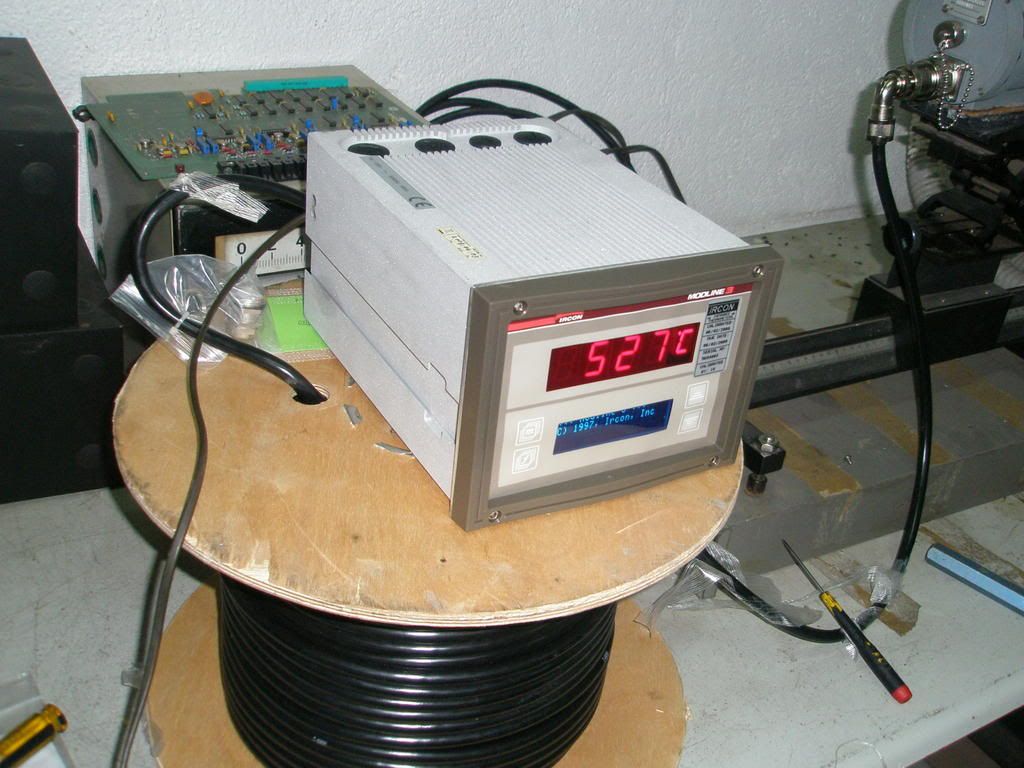
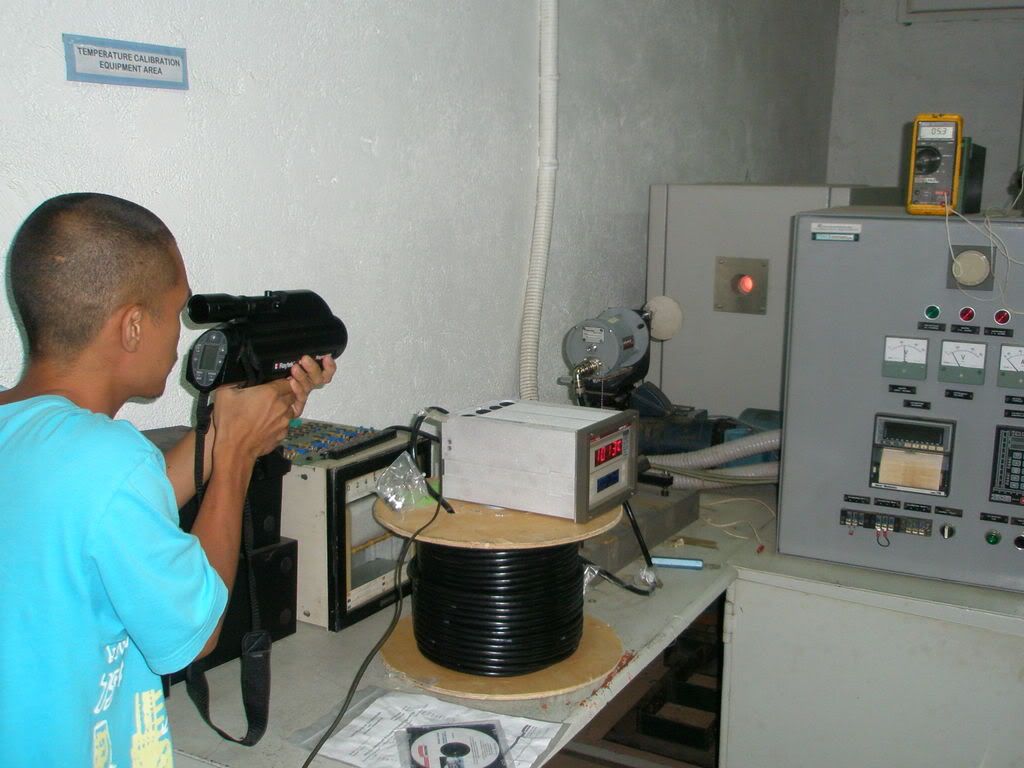
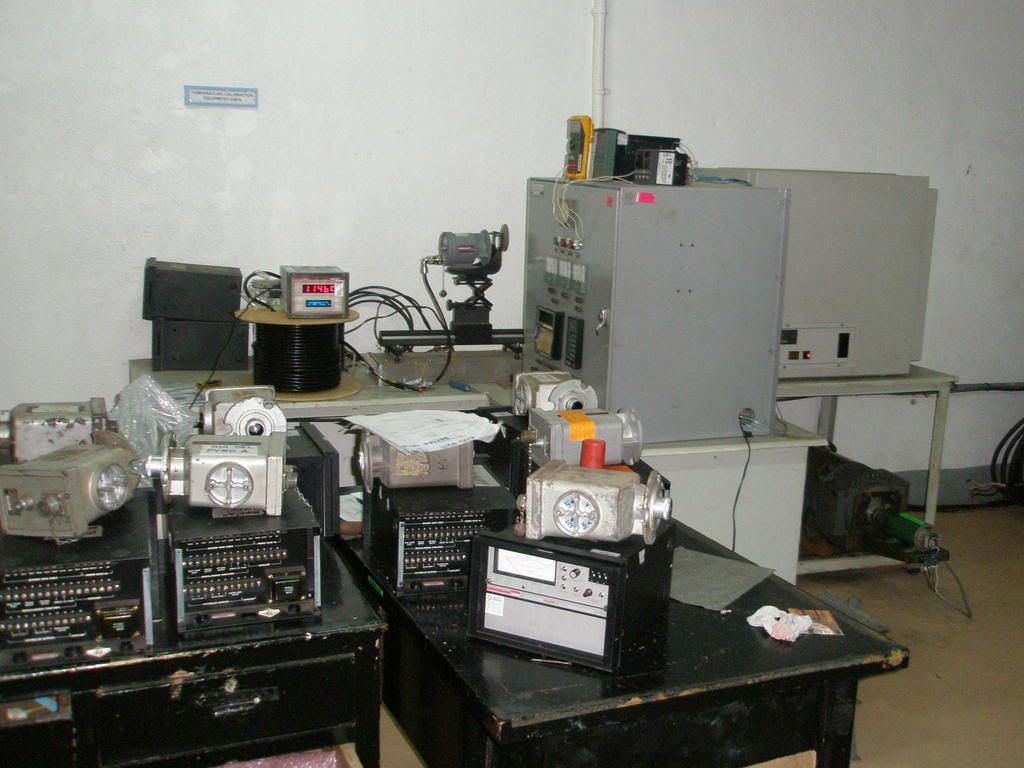
I have here some pictures while in the process of calibrating pyrometers using a black body.


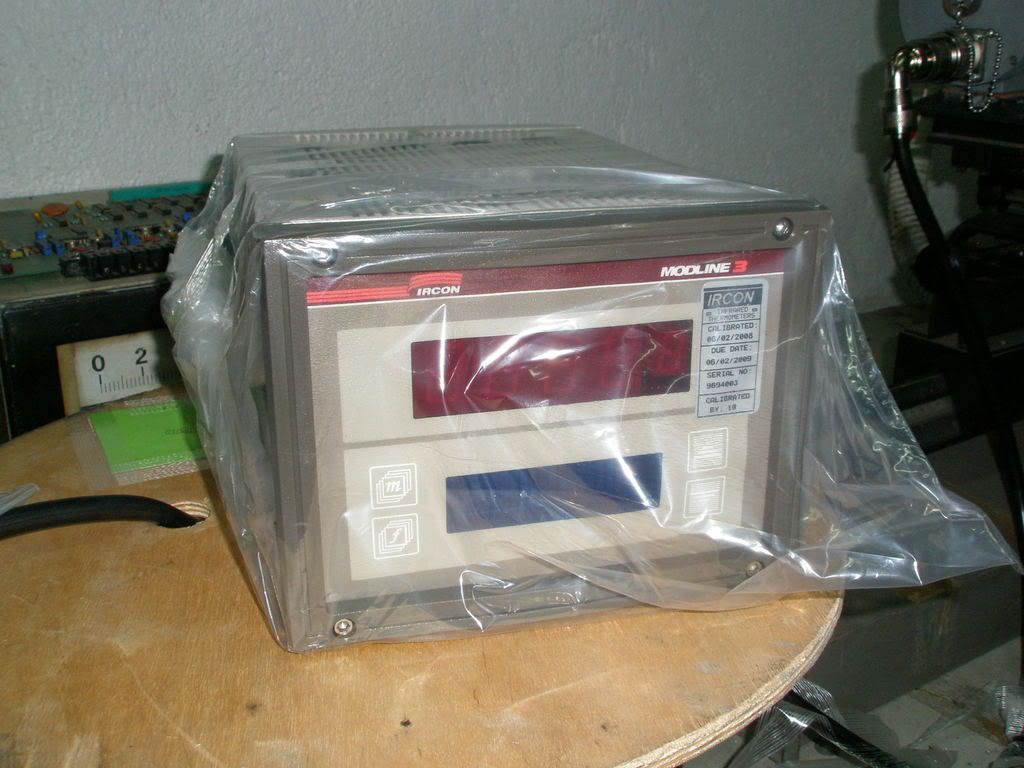
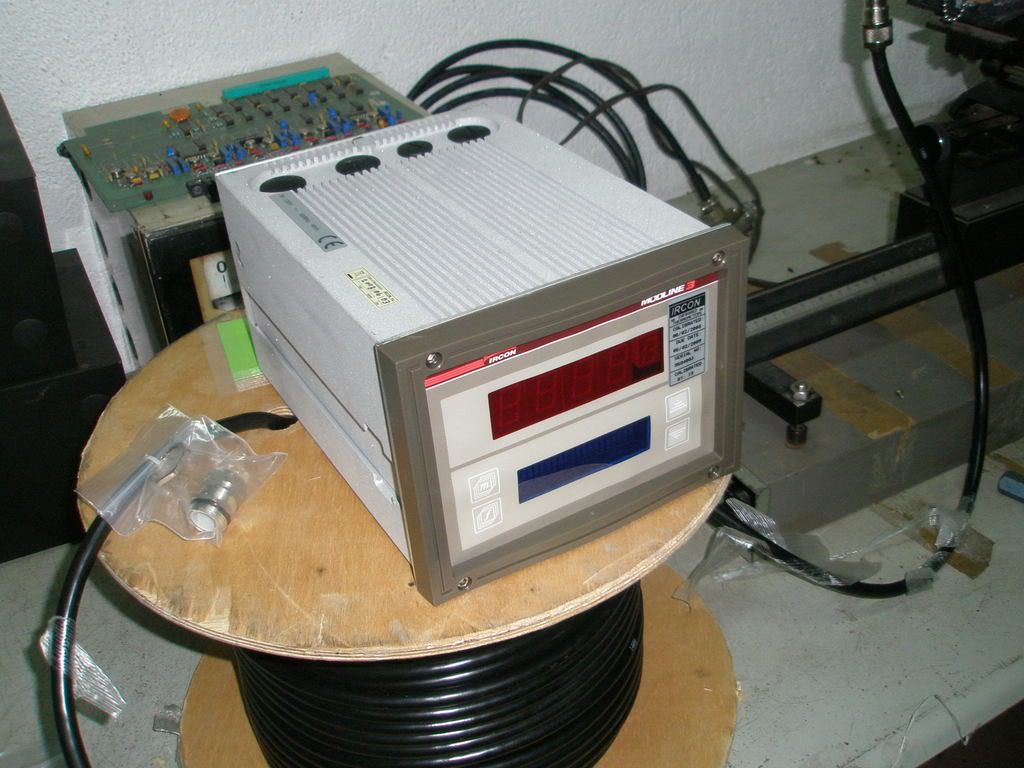
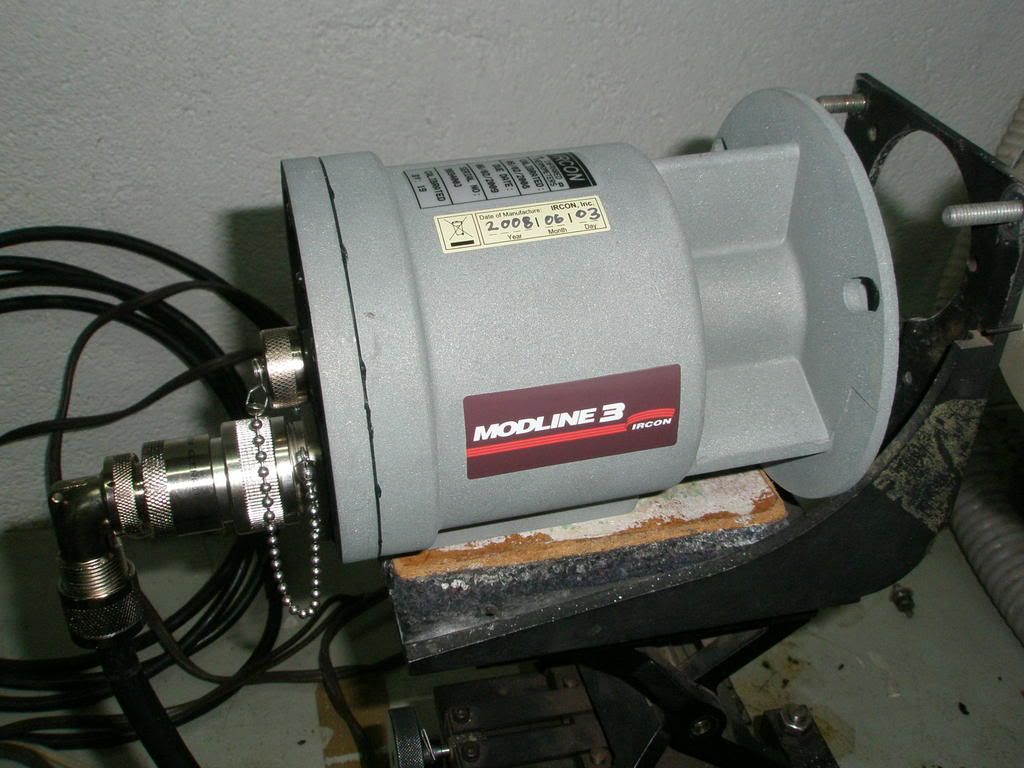
A brand new digital pyrometer from Ircon (Modline 3 Series). The plastic bag encasing the said meter is removed. This unit is already calibrated by its manufacterer and is delivered with a calibration certificate but we are testing this one just making sure if their calibration standards are in line with the user's standards.


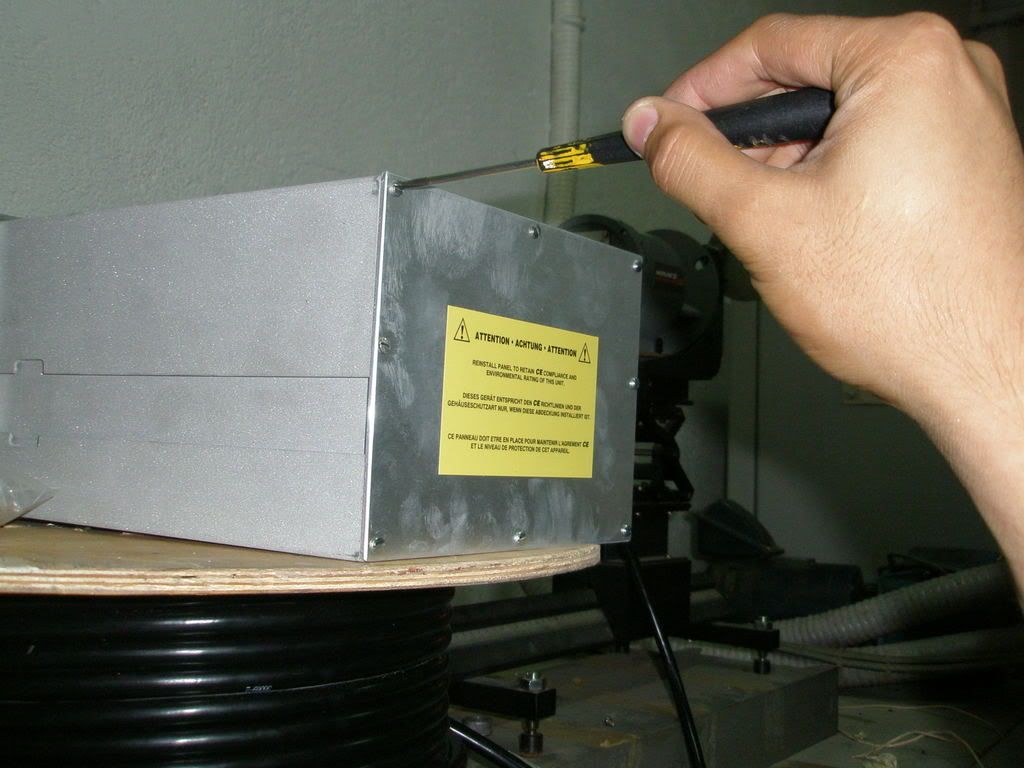
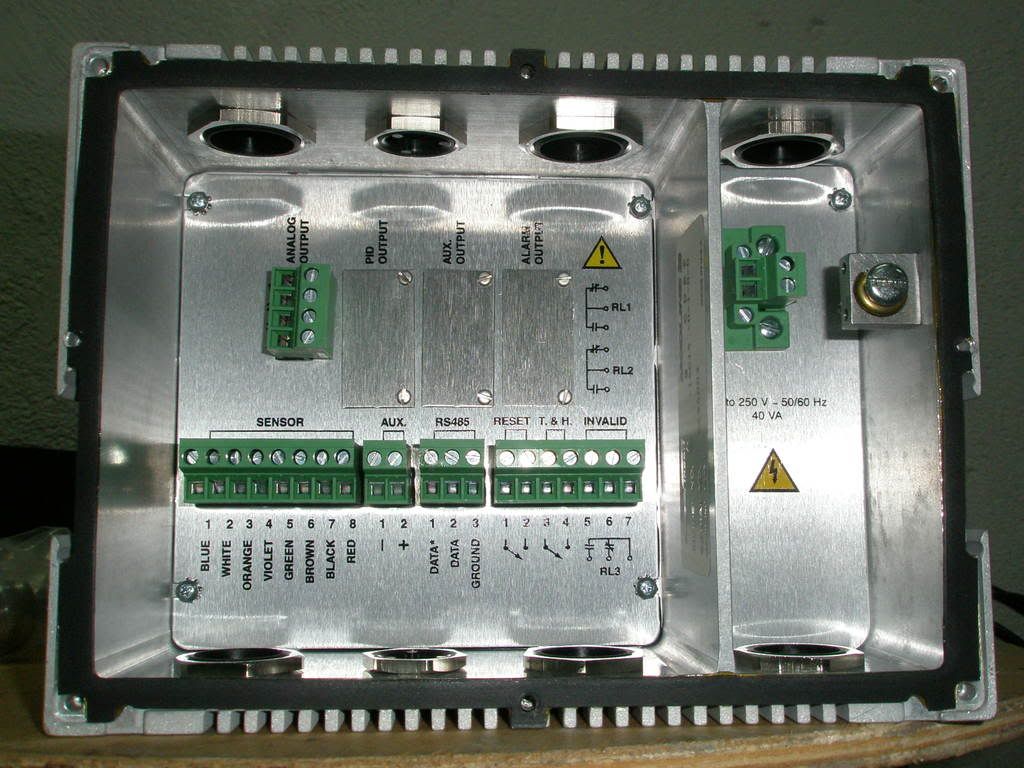
^^^ At the back of the meter, one can see eight screws securing the back panel cover. Remove it using a flat screwdriver. Various connectors can be seen like analog and relay outputs, connectors to receive and drive the sensor head, power input and others as well.


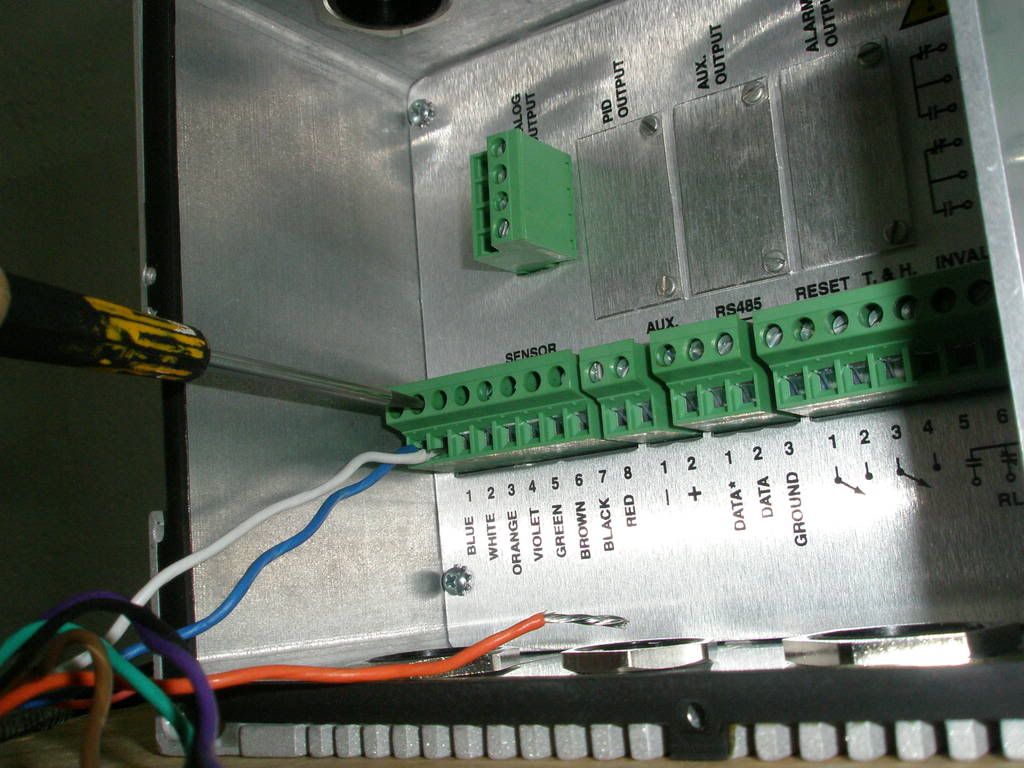
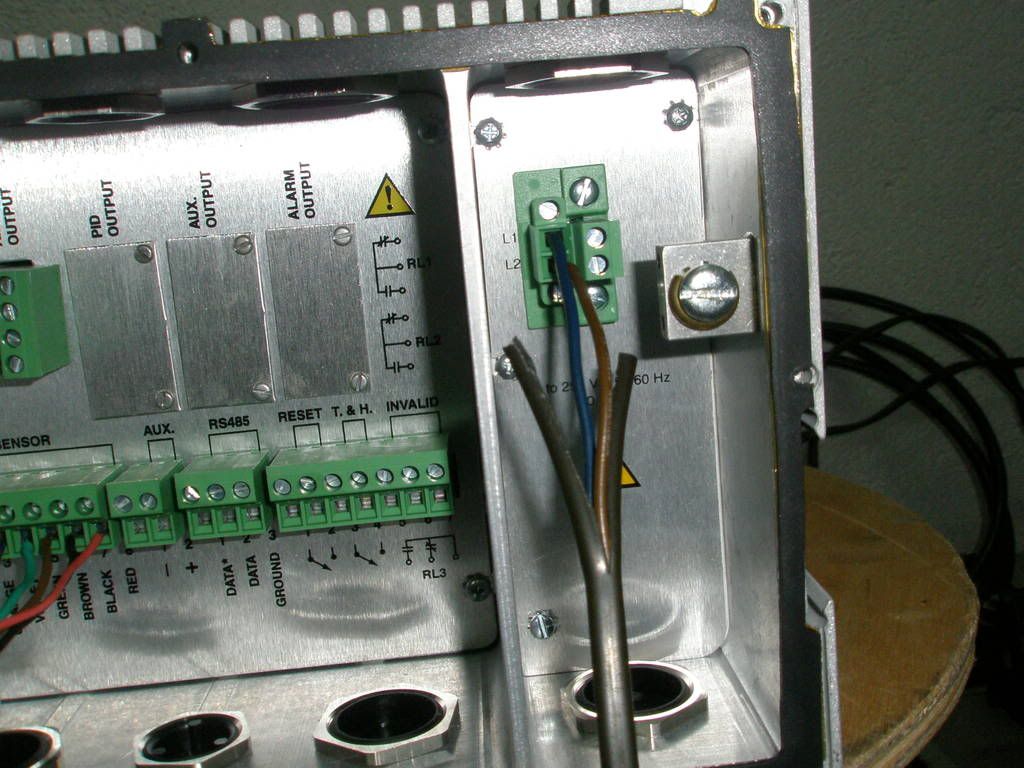
^^^ Connect the wires from the cable from the sensor head using a small flat screwdriver. Don't worry on which wire to connect to the slot. If one bought a multi core cable designated for use for this pyrometer (contact the manufacturer for the said cable specifications), color coding are used as based on the ones printed below the connector as to what color of the wire it is should be paired with. Lastly connect the power line as indicated in the second pic. Do not turn on yet the said unit.


^^^ Mount the sensor head on a stable stand or platform in front of the black body calibrator set to a certain temperature within the range of the pyrometer. What one can see here is that the said sensor is mounted on a stable but adjustable stand with variable x and y axes so one can adjust the unit without any external 'disturbance'. Connect the cable from the controller/indicator to the sensor.


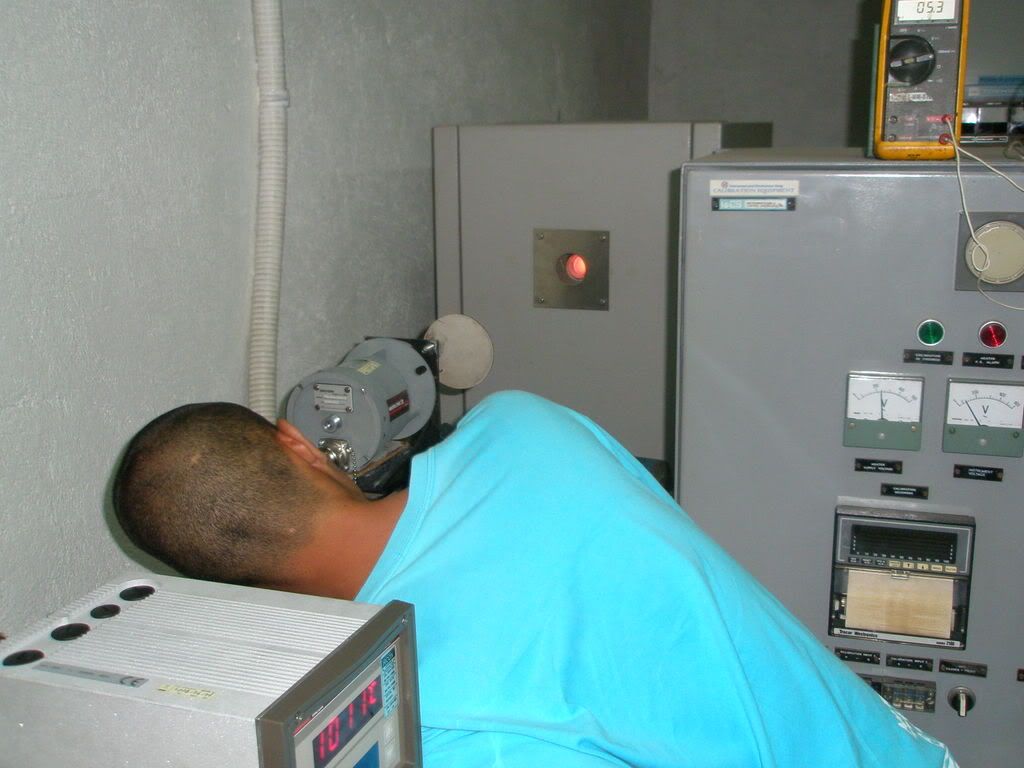
^^^ Remove the eypiece cover and see to it that the sensor head is exactly aligned with the black body by sighting through it. One can see a small circle as a guide. A little deviation from the said alignment would result in significant error in its reading so be very careful.


^^^Turn on the the unit by plugging it to a convenience outlet or other power source which can provide a 90-230 volts AC source. Let it stand for 30 to 60 minutes before officially taking readings to allow the electronics circuits to stabilize. The second pic is showing a calibration specialist taking a reading from the black body using a digital infrared thermometer in par with the pyrometer to ensure a standardized read out.

If through the test process, the meter is not in line with the standards, adjustments would be made such as zeroing, span, and gain through potentiometers located inside the sensor head and the controller.


A whole bunch of digital and analog pyrometers waiting to be test read and calibrated.