

The word pyrometer comes from the Greek word for fire, "πυρ", and meter, meaning to measure. Pyrometer was originally coined to denote a device capable of measuring temperatures of objects above incandescence (i.e. objects bright to the human eye).
Pyrometers are used to 'read' radiated heat in steel industries, ceramic manufacturing and other applications requiring high temperature from a few hundreds to thousands of degrees Celsius of temperature. Most pyrometers come in a set of a sensor and a controller. The controller may come readouts of analog or digital.
I have here some pictures while in the process of calibrating pyrometers using a black body.

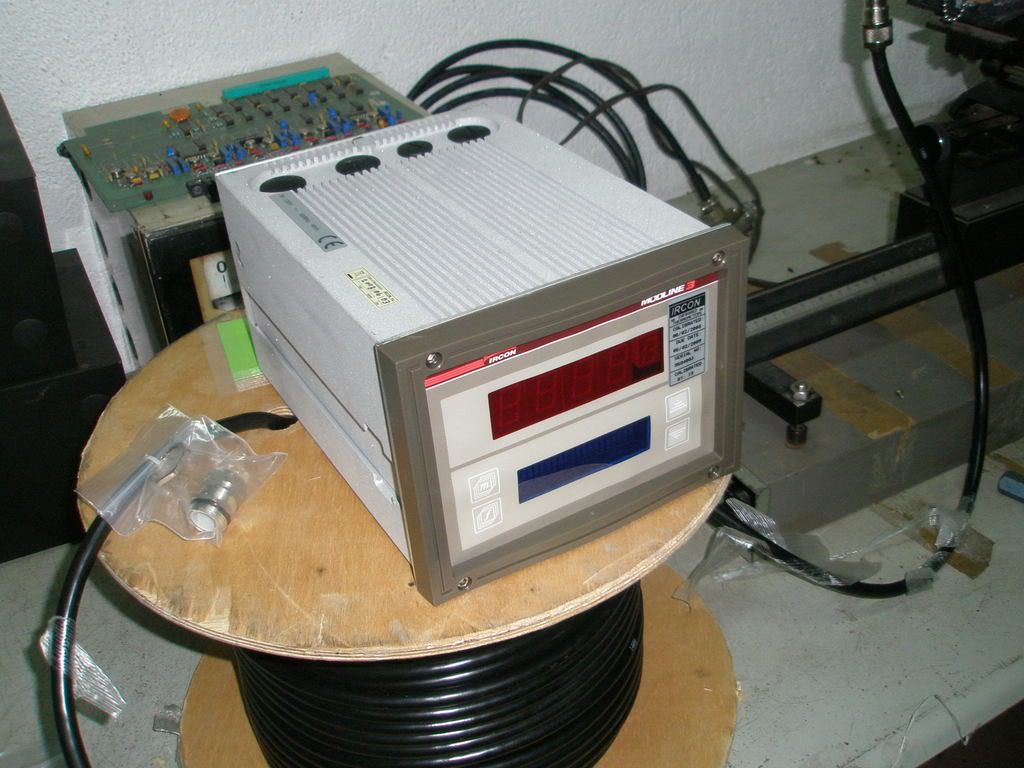
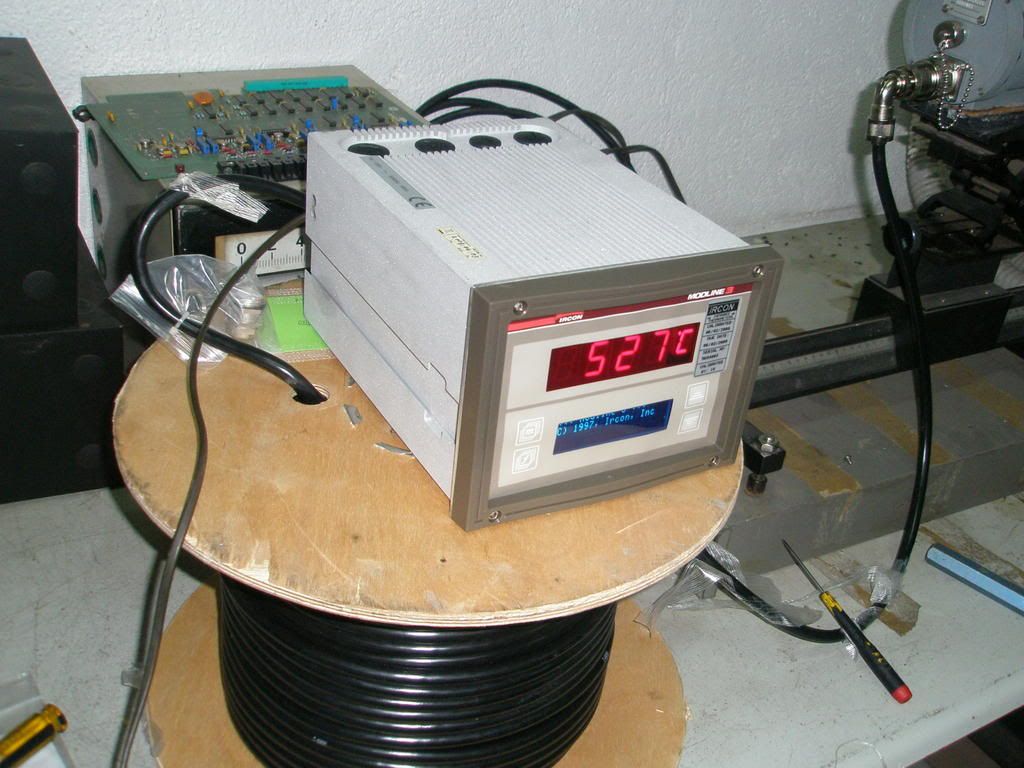
A brand new digital pyrometer from Ircon (Modline 3 Series). The plastic bag encasing the said meter is removed. This unit is already calibrated by its manufacterer and is delivered with a calibration certificate but we are testing this one just making sure if their calibration standards are in line with the user's standards.
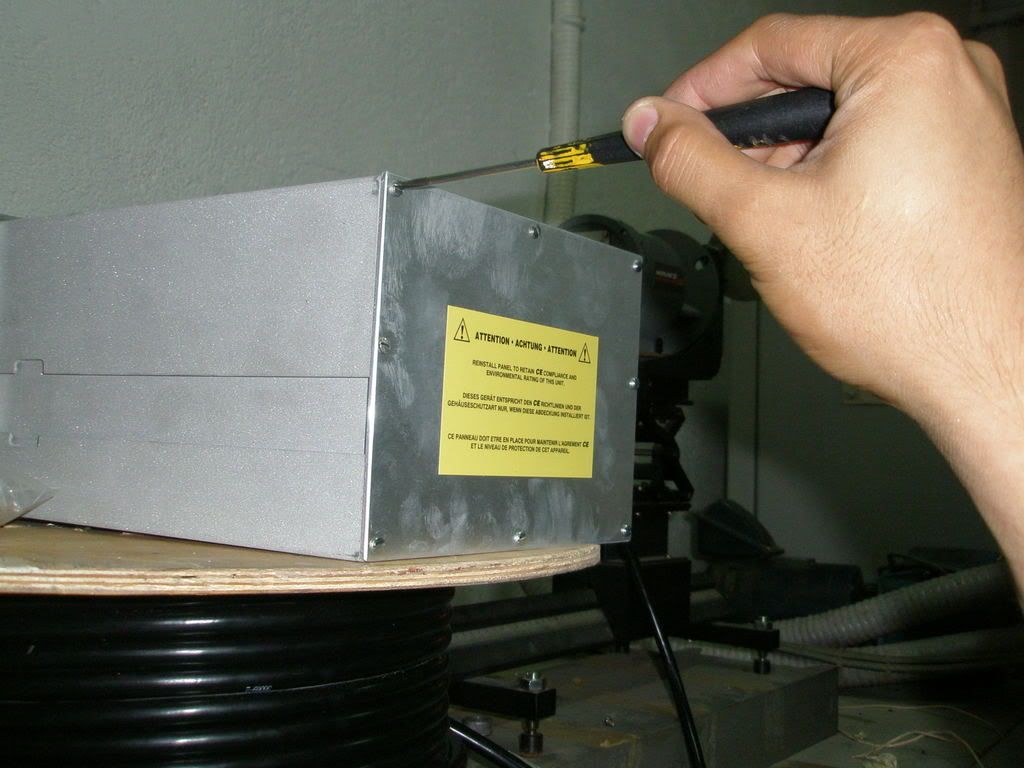
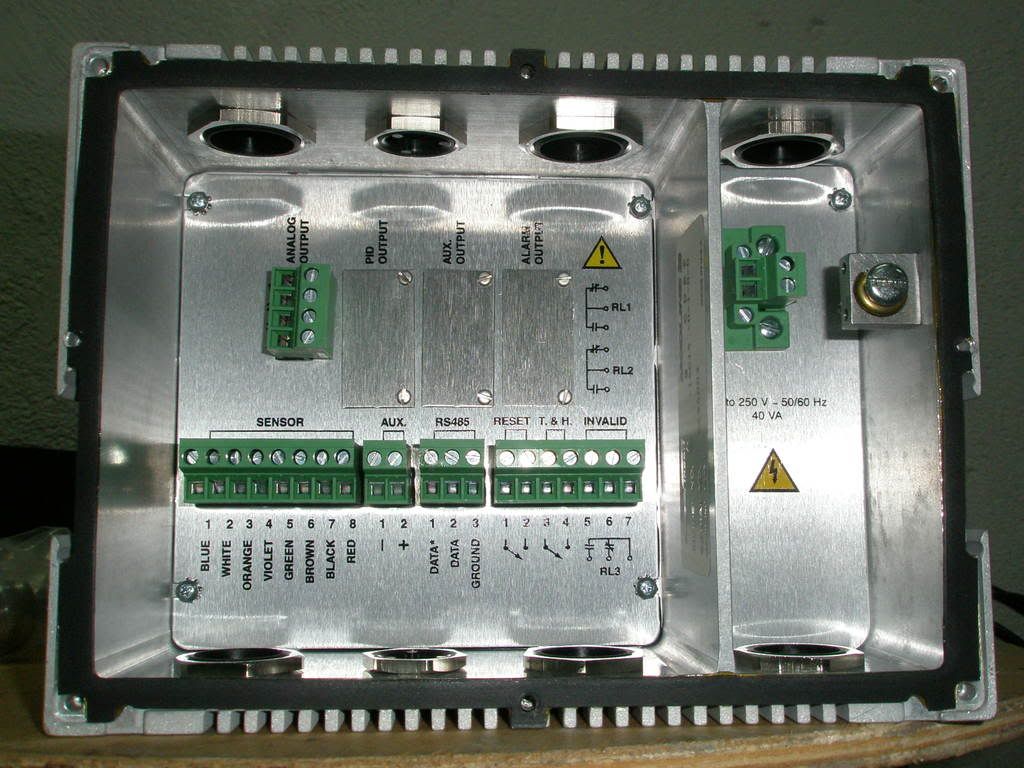
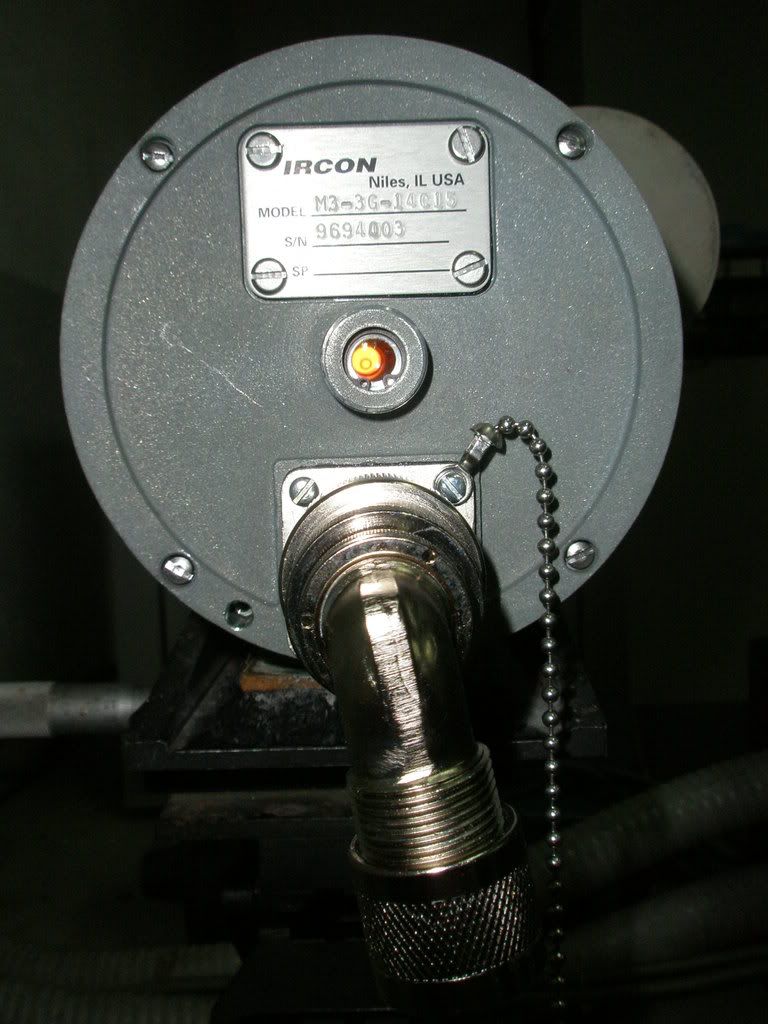
^^^ At the back of the meter, one can see eight screws securing the back panel cover. Remove it using a flat screwdriver. Various connectors can be seen like analog and relay outputs, connectors to receive and drive the sensor head, power input and others as well.
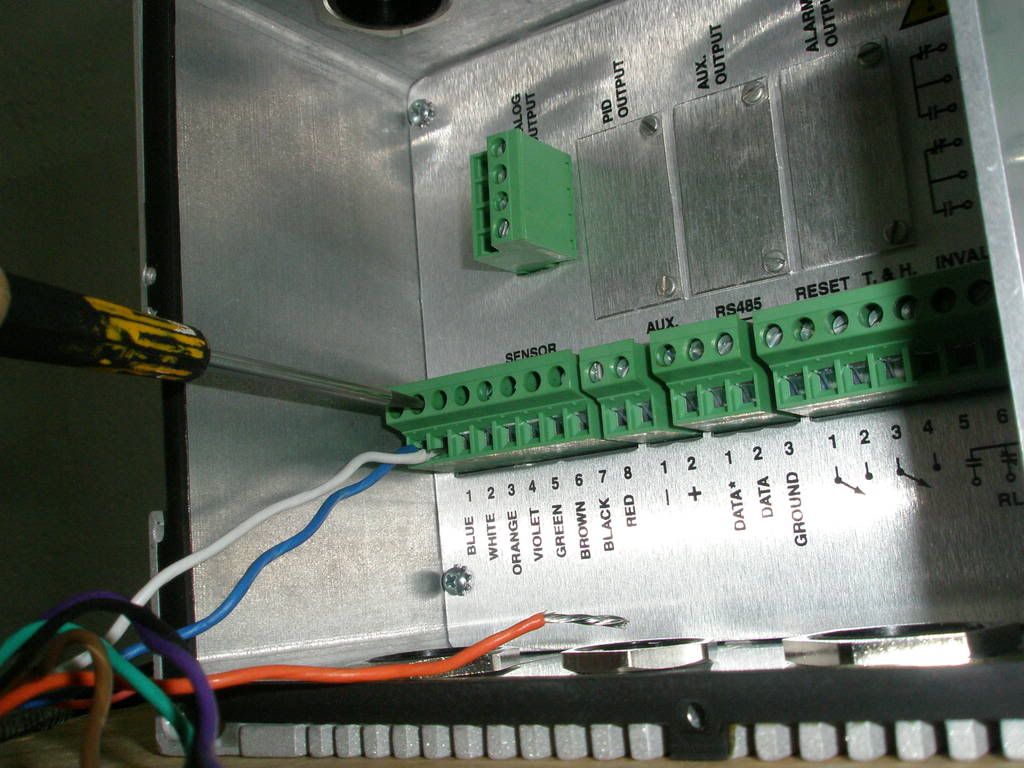
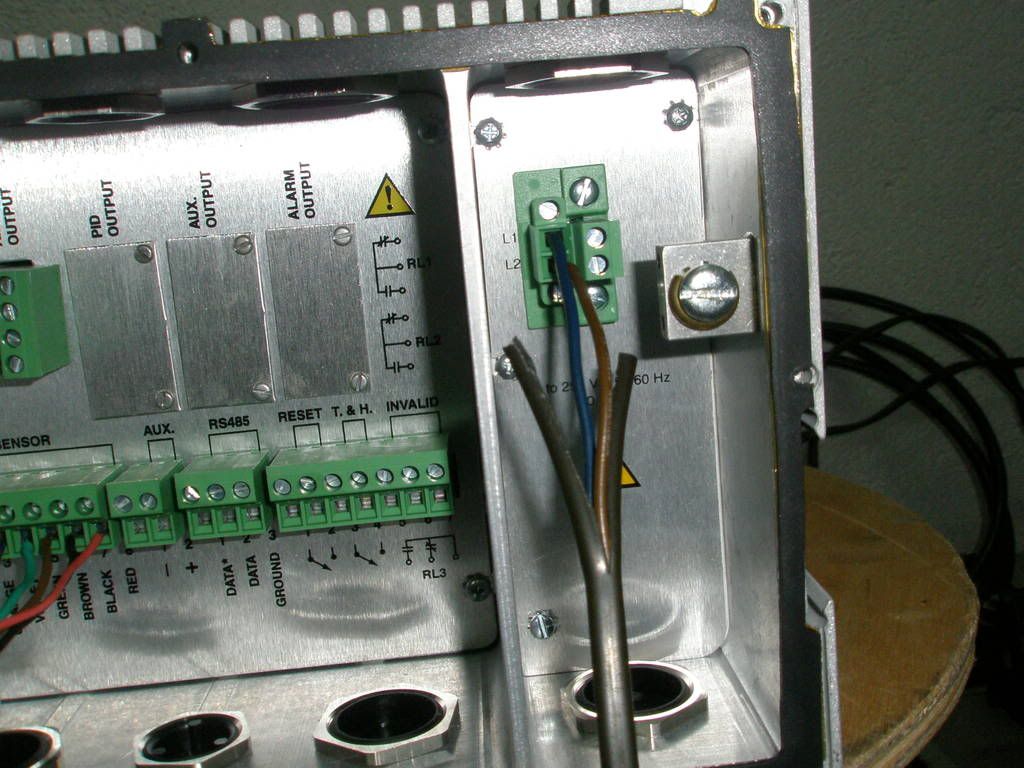
^^^ Connect the wires from the cable from the sensor head using a small flat screwdriver. Don't worry on which wire to connect to the slot. If one bought a multi core cable designated for use for this pyrometer (contact the manufacturer for the said cable specifications), color coding are used as based on the ones printed below the connector as to what color of the wire it is should be paired with. Lastly connect the power line as indicated in the second pic. Do not turn on yet the said unit.
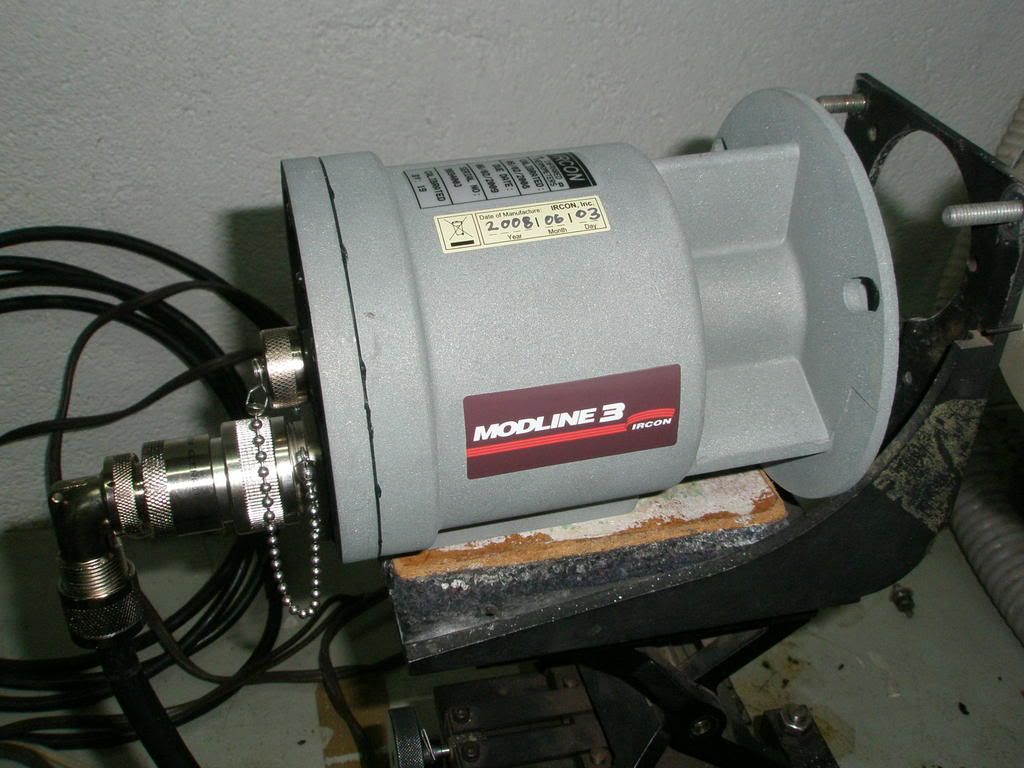
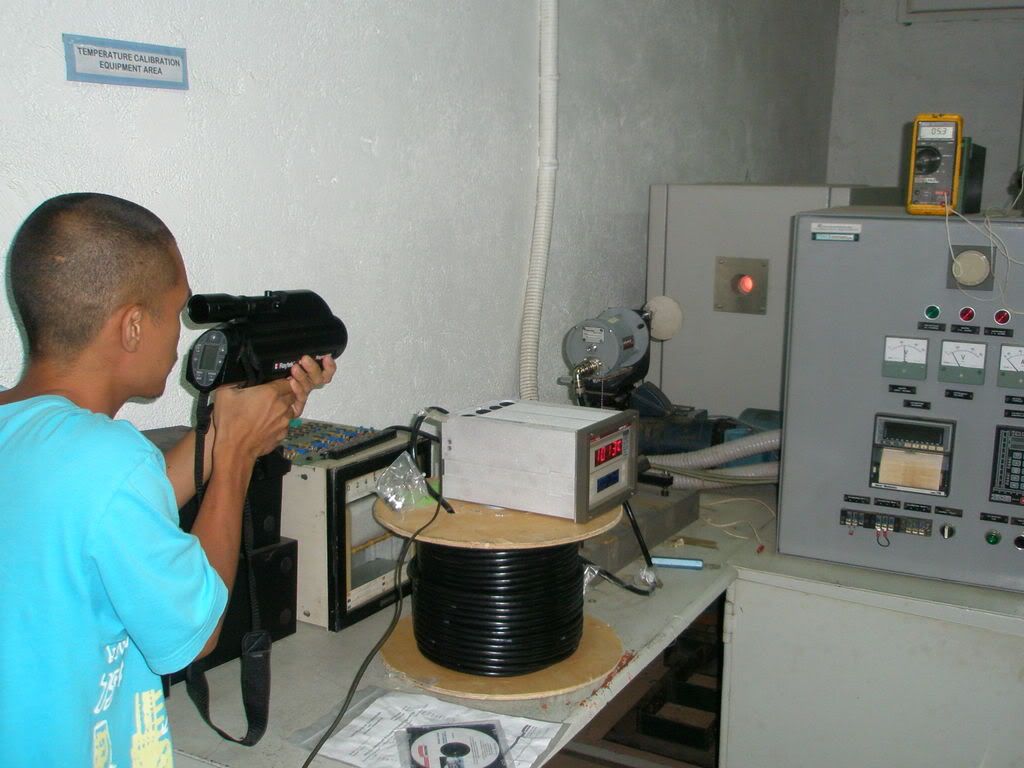
^^^ Mount the sensor head on a stable stand or platform in front of the black body calibrator set to a certain temperature within the range of the pyrometer. What one can see here is that the said sensor is mounted on a stable but adjustable stand with variable x and y axes so one can adjust the unit without any external 'disturbance'. Connect the cable from the controller/indicator to the sensor.
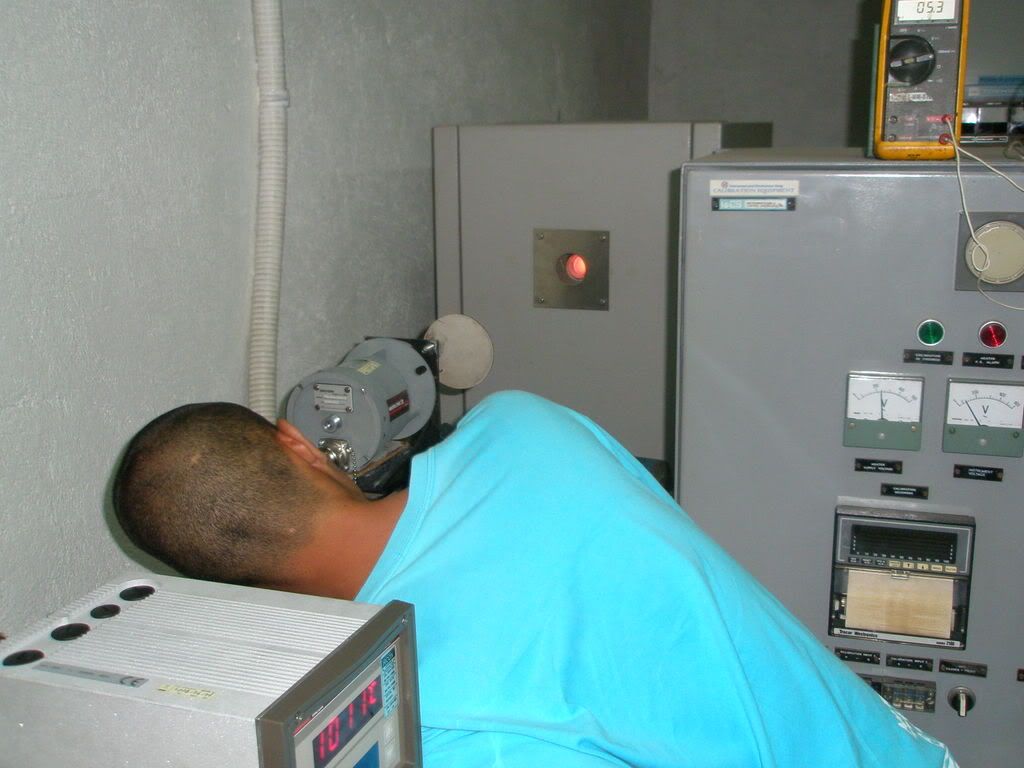
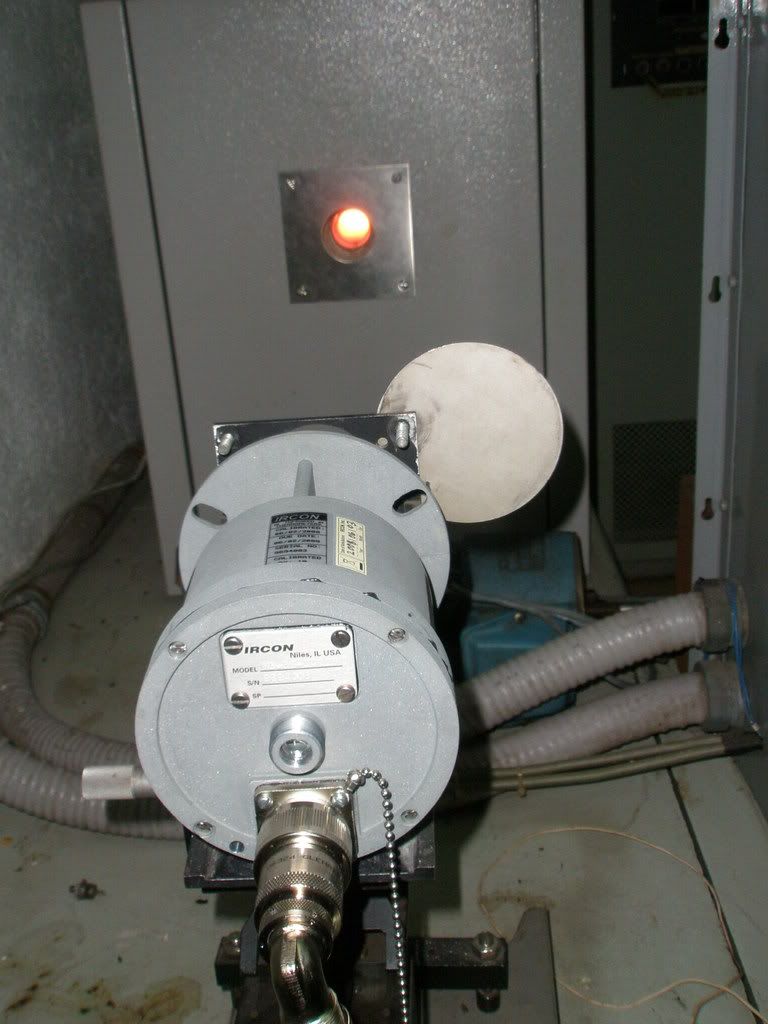
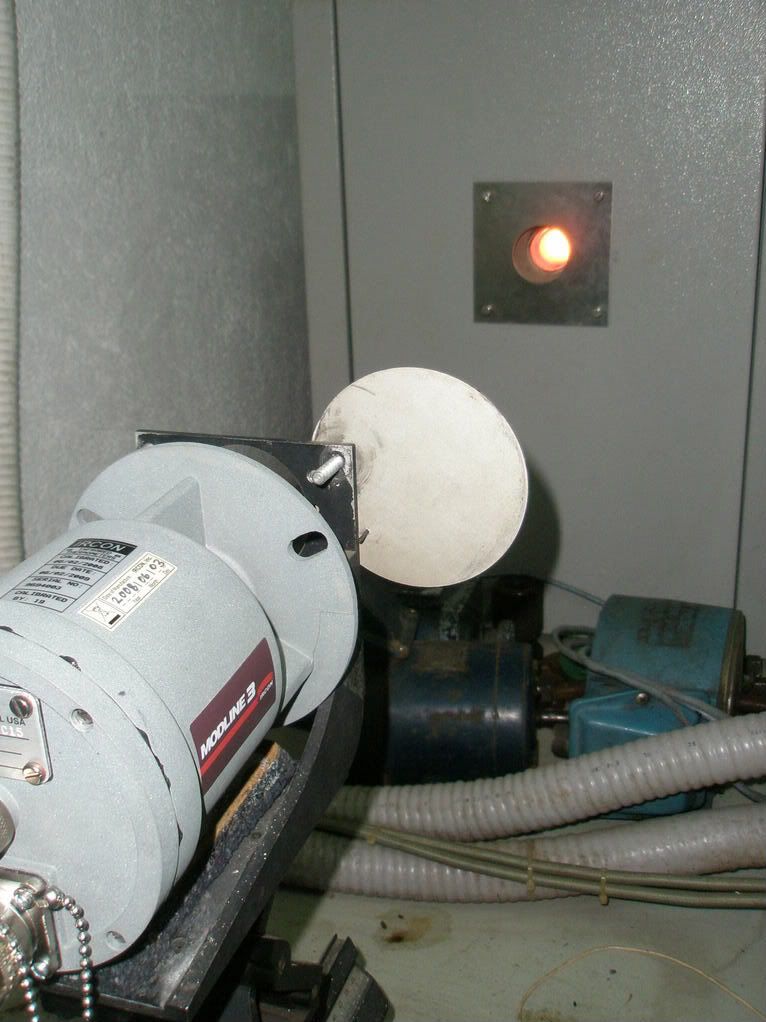
^^^ Remove the eypiece cover and see to it that the sensor head is exactly aligned with the black body by sighting through it. One can see a small circle as a guide. A little deviation from the said alignment would result in significant error in its reading so be very careful.
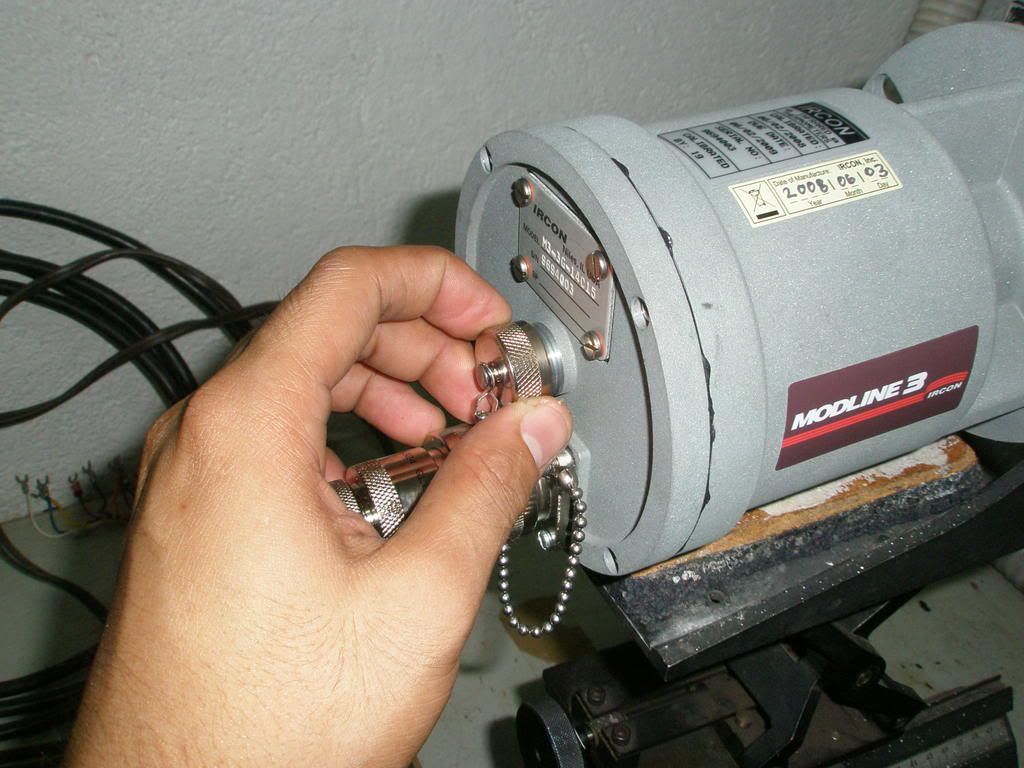
^^^Turn on the the unit by plugging it to a convenience outlet or other power source which can provide a 90-230 volts AC source. Let it stand for 30 to 60 minutes before officially taking readings to allow the electronics circuits to stabilize. The second pic is showing a calibration specialist taking a reading from the black body using a digital infrared thermometer in par with the pyrometer to ensure a standardized read out.
If through the test process, the meter is not in line with the standards, adjustments would be made such as zeroing, span, and gain through potentiometers located inside the sensor head and the controller.
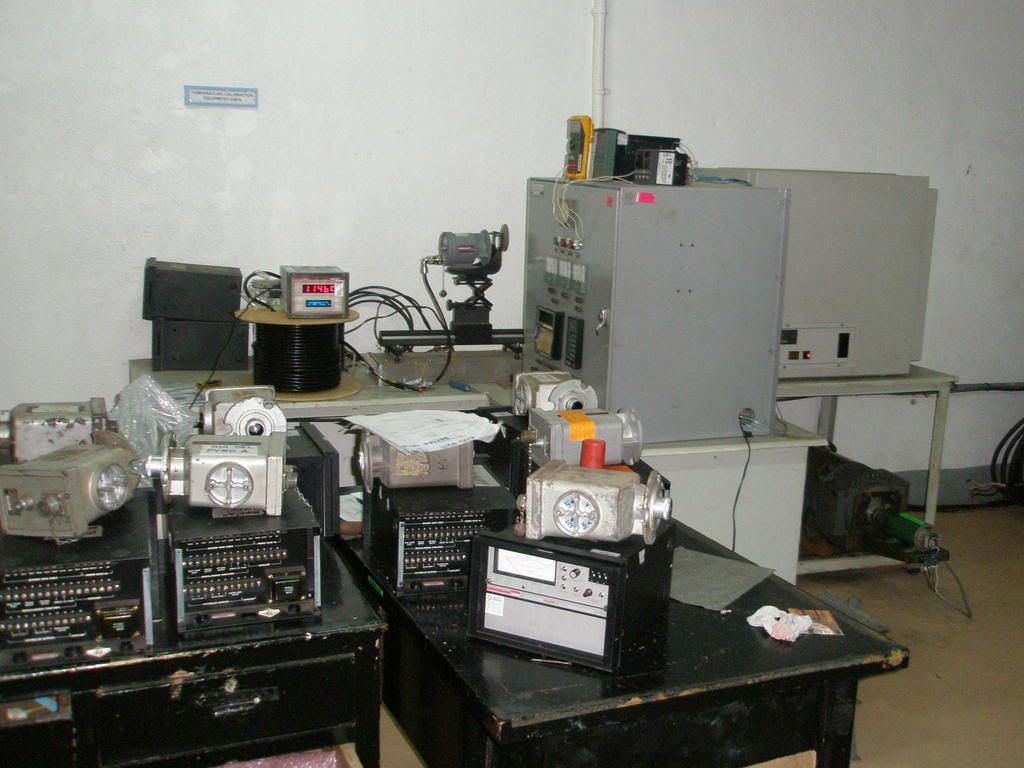
A whole bunch of digital and analog pyrometers waiting to be test read and calibrated.